
Playing with Blocks
/ In a society infatuated with technology, I opted to create a calendar project to remind us of simpler times. Most of us have a memory of playing with blocks (whether wooden or Legos); so I thought, why not make something that was both playful and functional? The result: a four year “semi-perpetual” calendar with a crafty spirit for your home, office or wherever.
Materials:
10 Square Blocks 1”
1 Axle Cap for ¼” (You can also use a bead or even tie ribbon or string… as long as it holds)
Wooden Dowel ¼” (At least 6” long)
Acrylic Paint (Your color preference; I used black)
Acrylic Medium Golden Soft Gel Matte (You can also use clear nail polish or other medium finishes)
Glue Stick
In a society infatuated with technology, I opted to create a calendar project to remind us of simpler times. Most of us have a memory of playing with blocks (whether wooden or Legos); so I thought, why not make something that was both playful and functional? The result: a four year “semi-perpetual” calendar with a crafty spirit for your home, office or wherever.
Materials:
10 Square Blocks 1”
1 Axle Cap for ¼” (You can also use a bead or even tie ribbon or string… as long as it holds)
Wooden Dowel ¼” (At least 6” long)
Acrylic Paint (Your color preference; I used black)
Acrylic Medium Golden Soft Gel Matte (You can also use clear nail polish or other medium finishes)
Glue Stick
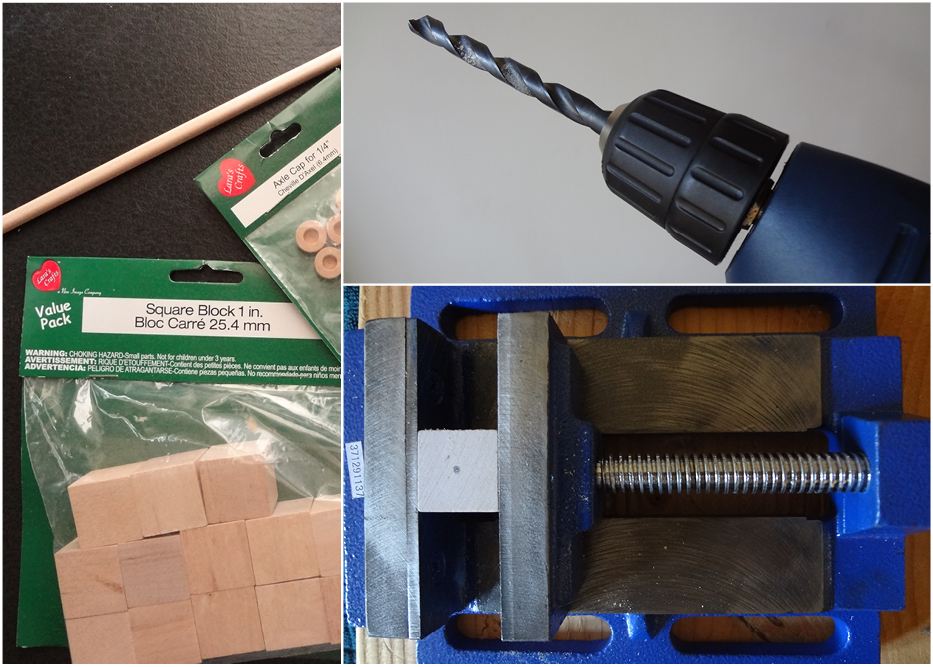
Hardware: Drill & any Drill Bit larger than ¼” Vice (Optional – Used to hold wooden blocks while drilling) Paint Brush Scissors Hand Saw (Something to cut the dowel) Printer Computer Sandpaper
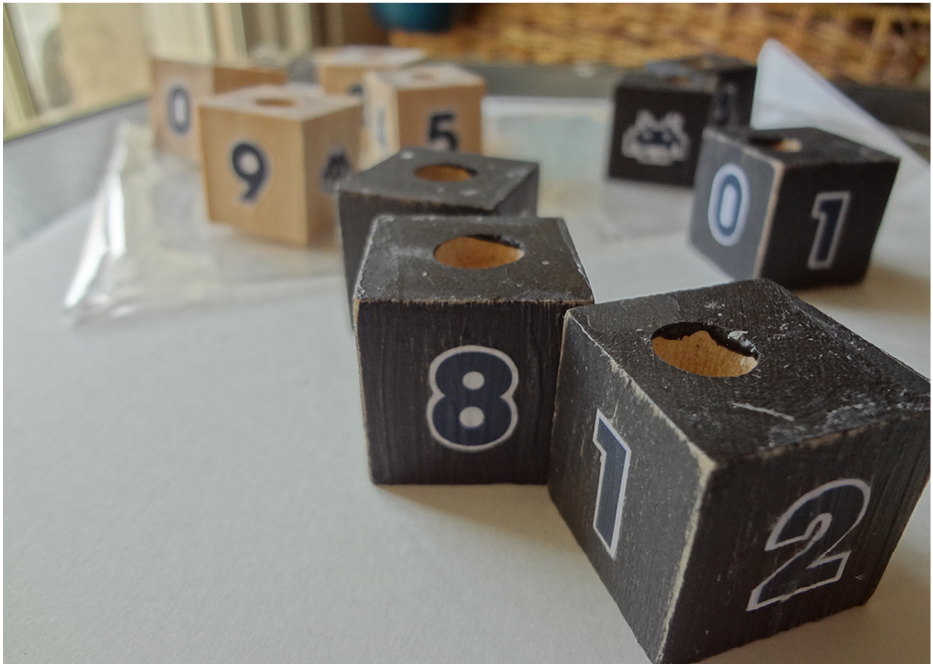
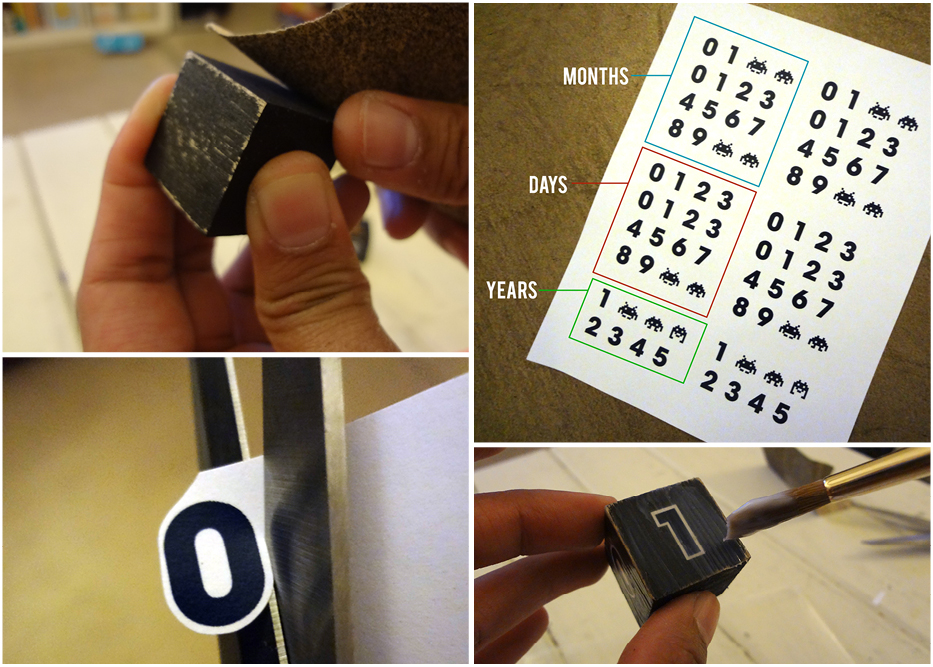
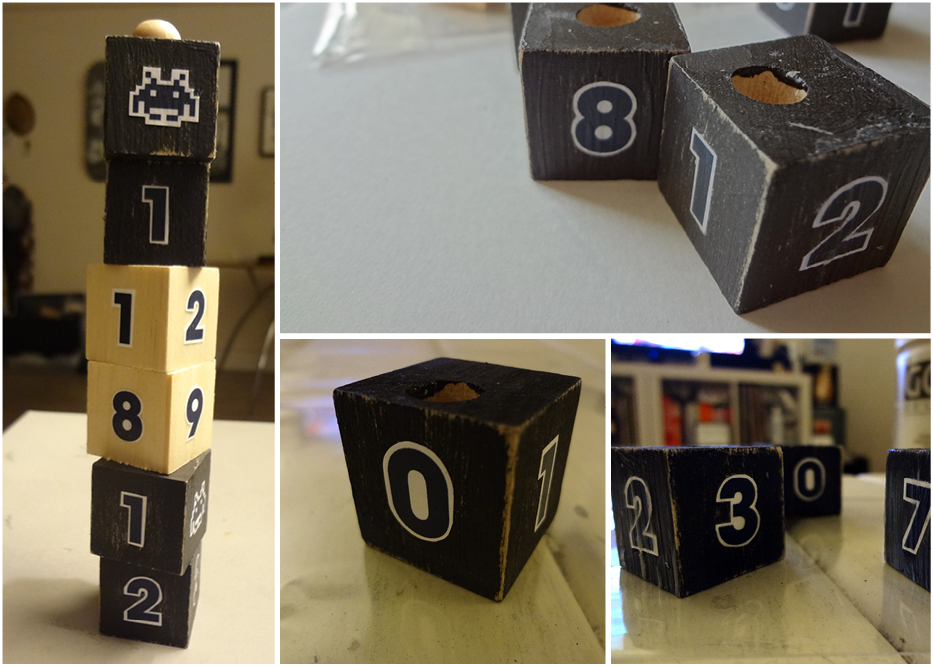
Steps: 1: Carefully (I used a vice) drill a hole in the center of each wooden block. Don’t worry about being perfect—that’s why I chose to use a significantly larger drill bit. 2: Cut the dowel (if it’s longer than 6”) using a handsaw. (Six inches fits six blocks --- you may want to give it room depending on how you are close the top.) 3. Using acrylic paint, customize each set of blocks as desired. Here’s the breakdown: four for months, four for days, and two for years; a total of 10. In this version, I painted a total of six blocks black (four for months, two for years) and the rest were left untreated.
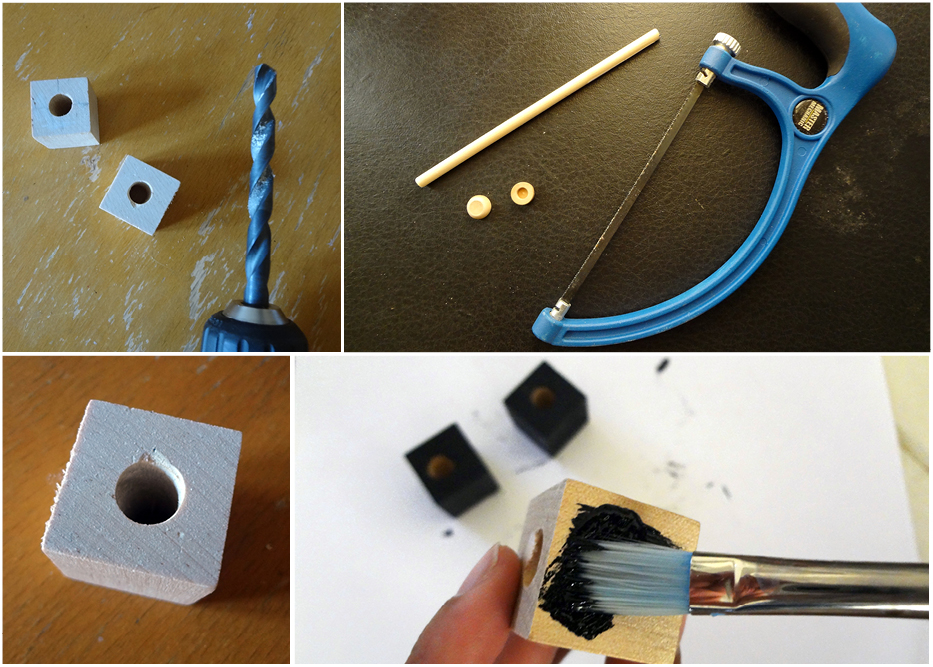 4: Once the blocks are dried, use the sandpaper to create a weathered effect. (Again, this is optional).
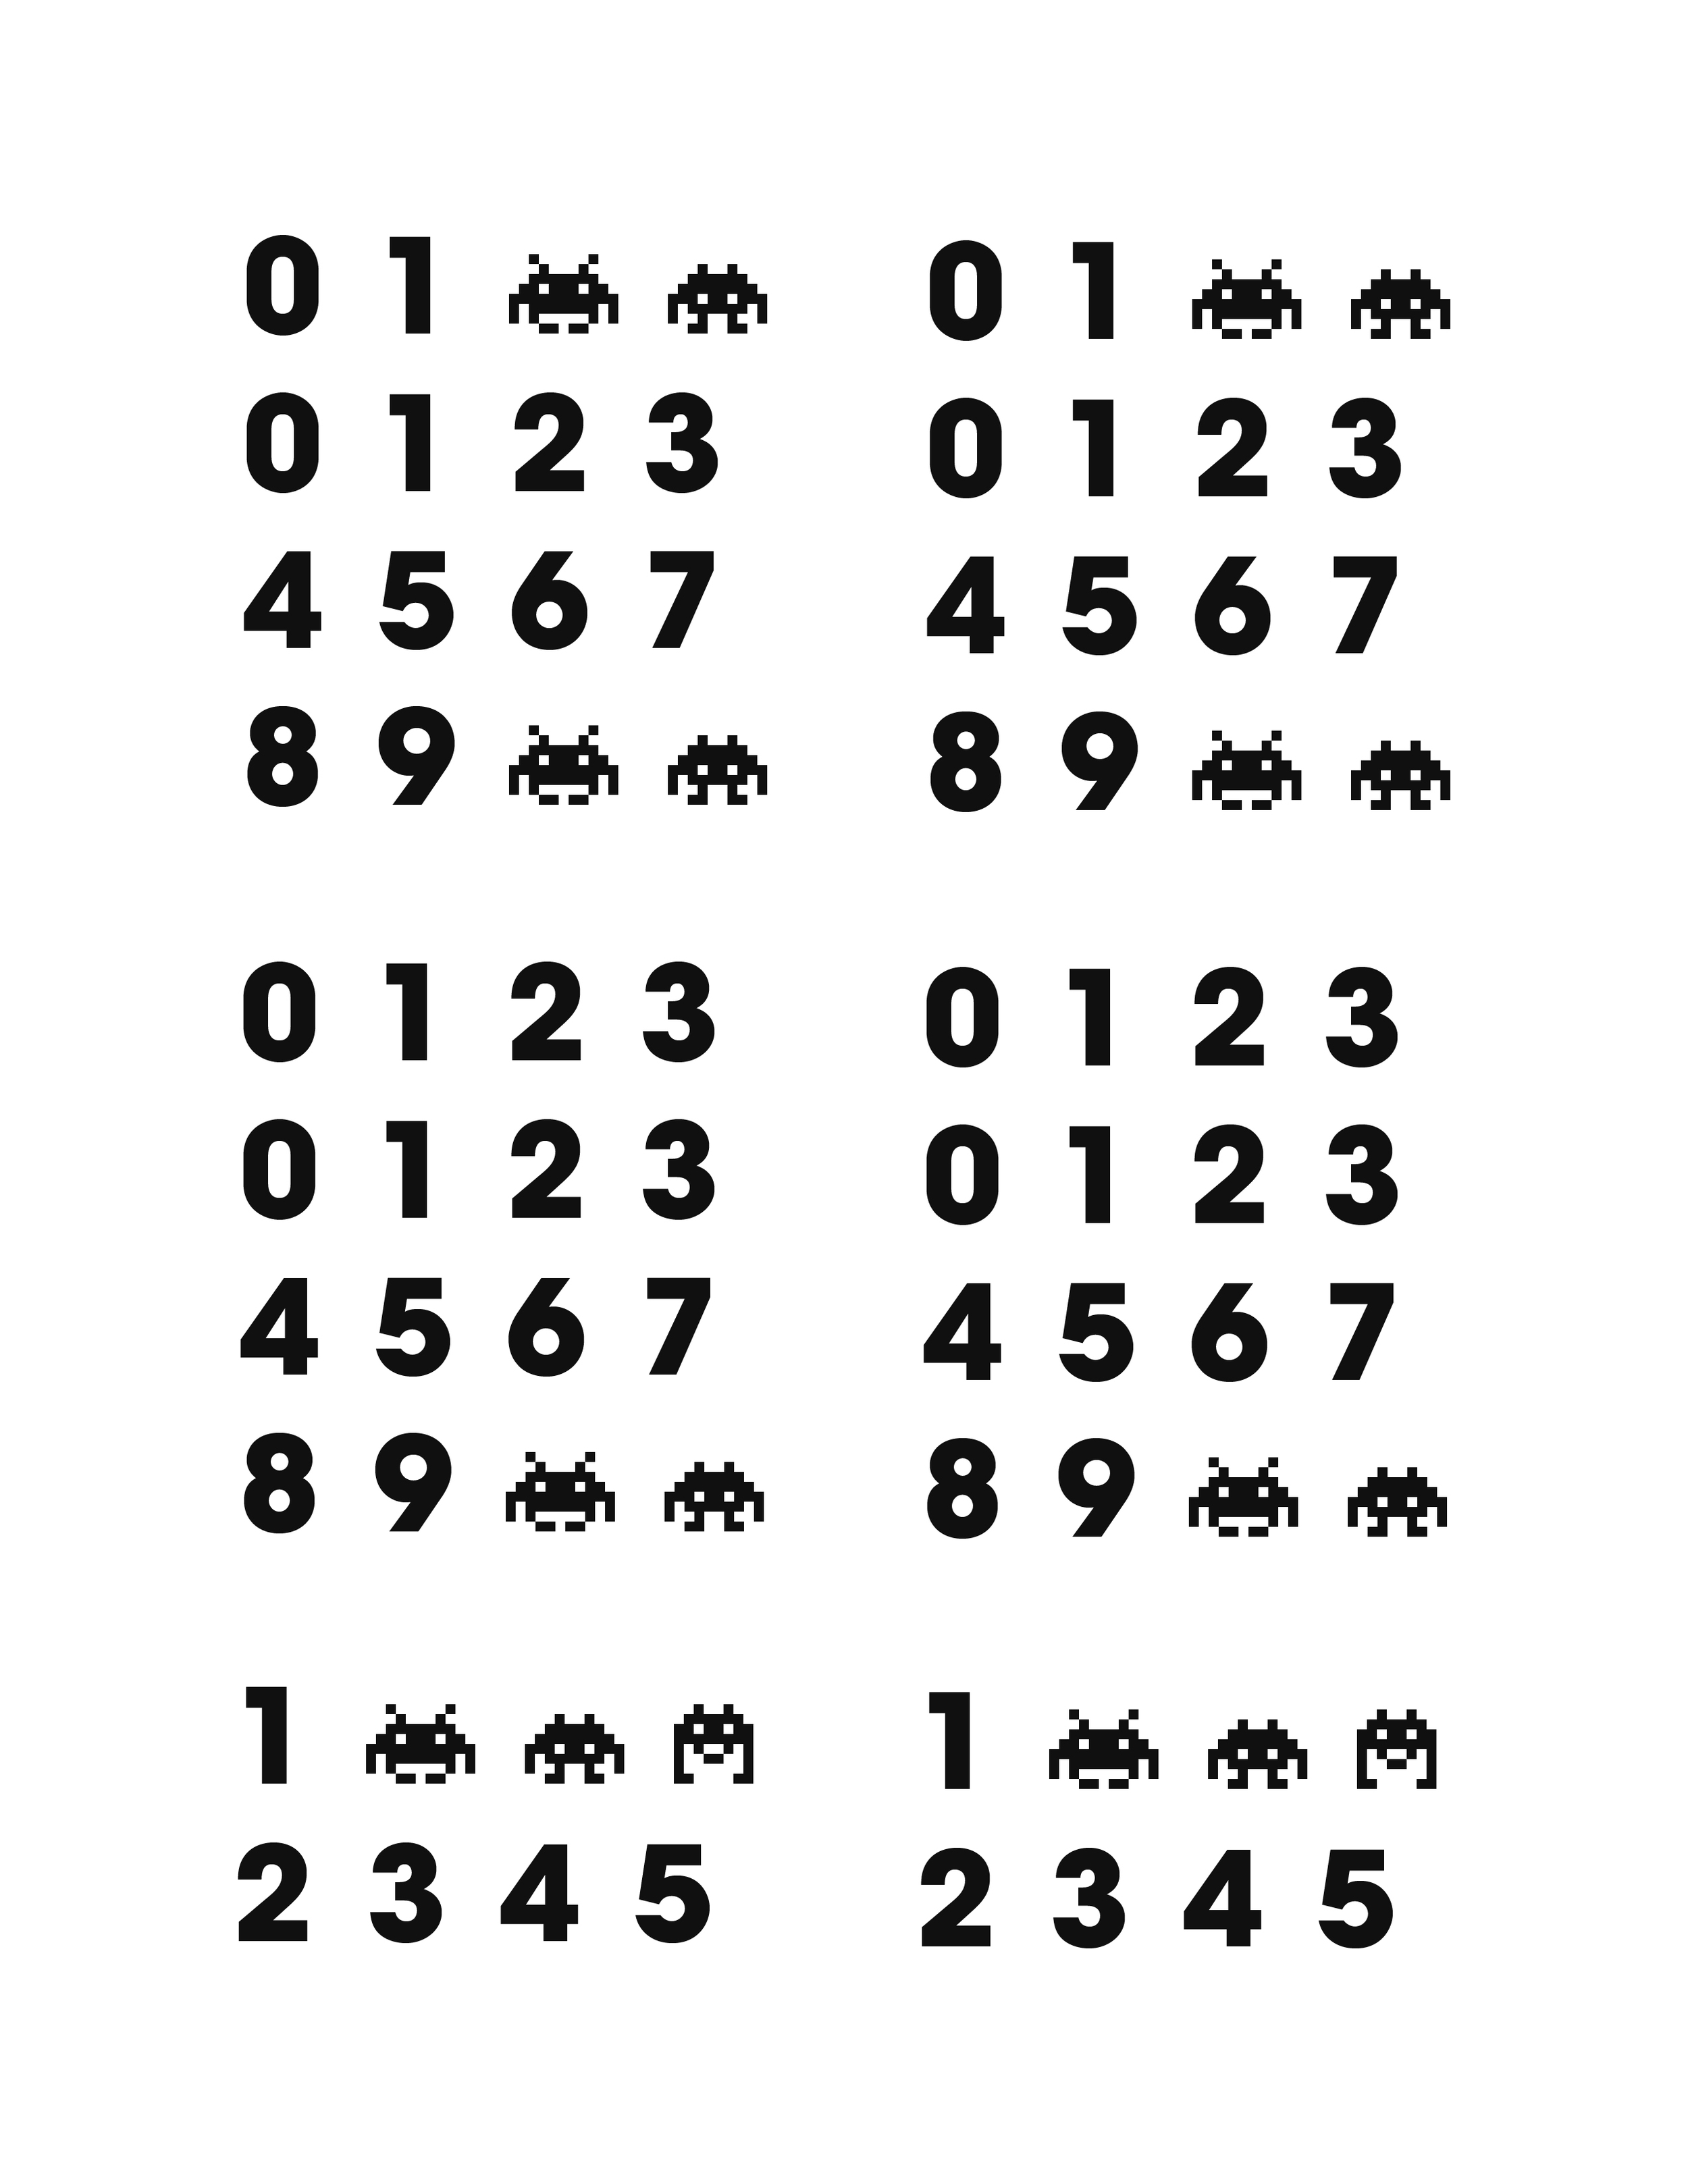
5: Print out the numbers on a 8.5”x11” sheet of paper. The print file has two sets of numbers just in case you mess one up. The numbers are broken into three sets: TOP (Months) – first four rows, MIDDLE (Days) – next four rows, and BOTTOM (Years) – last two rows. The space invaders were used to fill in the blank sides. If you decide to choose your own font and designs, I recommend making sure the fonts/images are no bigger than 0. 65”x0.65”.
4: Once the blocks are dried, use the sandpaper to create a weathered effect. (Again, this is optional).
5: Print out the numbers on a 8.5”x11” sheet of paper. The print file has two sets of numbers just in case you mess one up. The numbers are broken into three sets: TOP (Months) – first four rows, MIDDLE (Days) – next four rows, and BOTTOM (Years) – last two rows. The space invaders were used to fill in the blank sides. If you decide to choose your own font and designs, I recommend making sure the fonts/images are no bigger than 0. 65”x0.65”.
 6: Here’s the tedious part: cut out all the numbers and make sure you keep them in their corresponding groups of four.
7: Glue the numbers onto the blocks, making sure that the hole is on the top side.
8: Using the Matte Gel, apply a thick coat on top of each number, covering the entire side. Repeat for all numbers and blocks. Set aside to dry.
6: Here’s the tedious part: cut out all the numbers and make sure you keep them in their corresponding groups of four.
7: Glue the numbers onto the blocks, making sure that the hole is on the top side.
8: Using the Matte Gel, apply a thick coat on top of each number, covering the entire side. Repeat for all numbers and blocks. Set aside to dry.
 9: Once they’re dried, attach Axle Cap (or bead, or ribbon) to the top of the dowel and arrange blocks to the current date.
10: Variations: Try a horizontal layout instead of stacked, or a version without the dowel (just make sure to group the numbers in sets of six instead of four), or draw/paint the numbers…
9: Once they’re dried, attach Axle Cap (or bead, or ribbon) to the top of the dowel and arrange blocks to the current date.
10: Variations: Try a horizontal layout instead of stacked, or a version without the dowel (just make sure to group the numbers in sets of six instead of four), or draw/paint the numbers…
Enjoy!