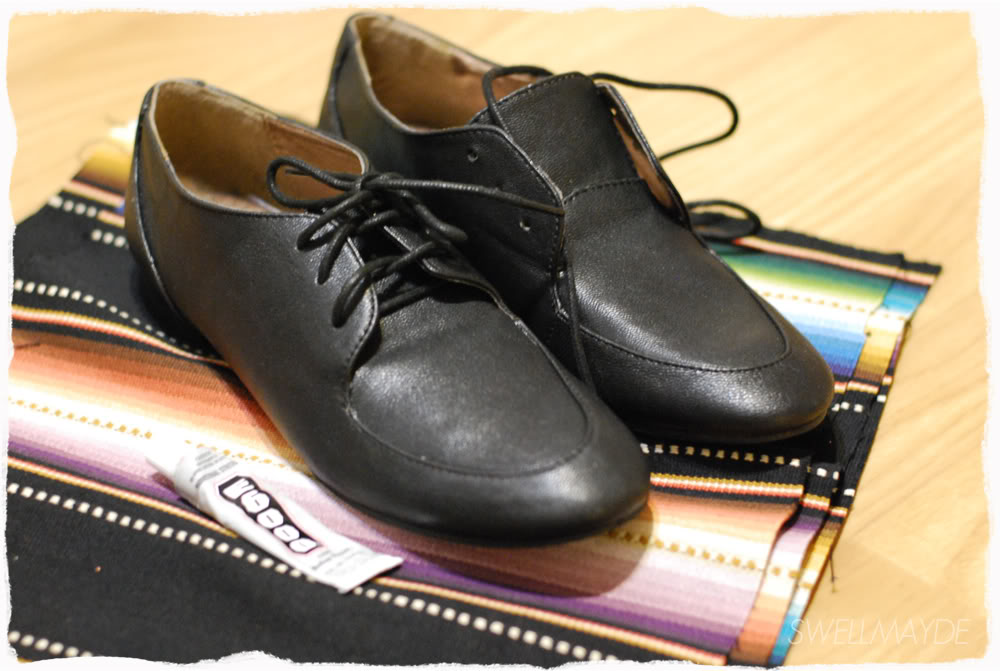
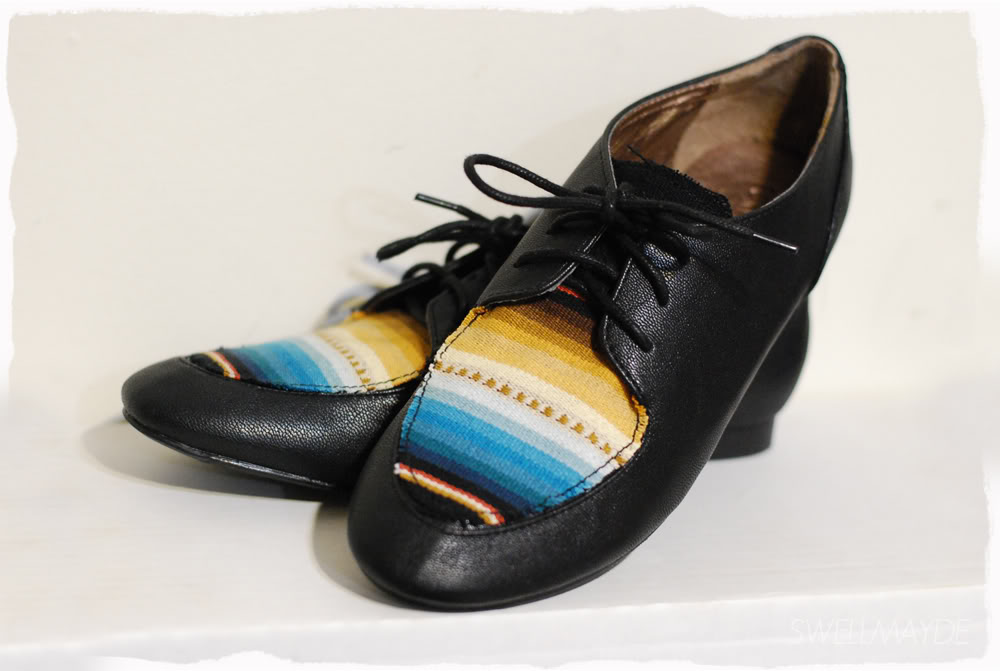
DIY: Serape Print Shoes

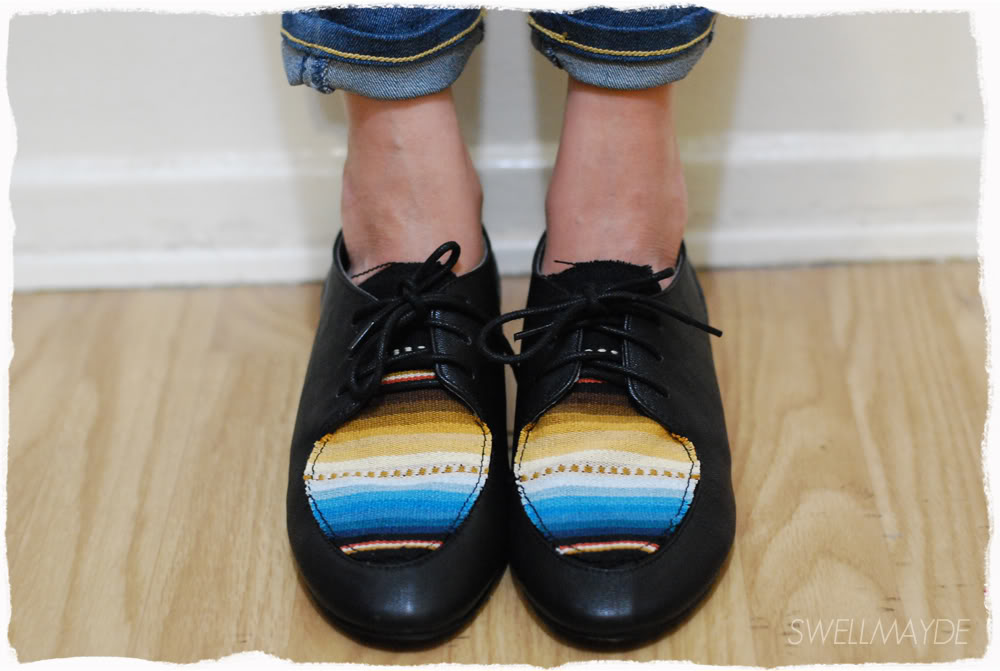
If you you've taken a peek at my  blog…  you probably noticed how much I love myself some ethnic prints. I especially love it in small pops in a wardrobe and thought it would look great on the upper portion of this shoe. The steps are pretty simple and can be used on a variety of different shoe styles, maybe something that's already in your closet. Here's how...


Materials:
- shoes
- serape print fabric (or any print you fancy)
- e6000 glue
- scissors
- pencil
- tracing paper
- tape
Steps
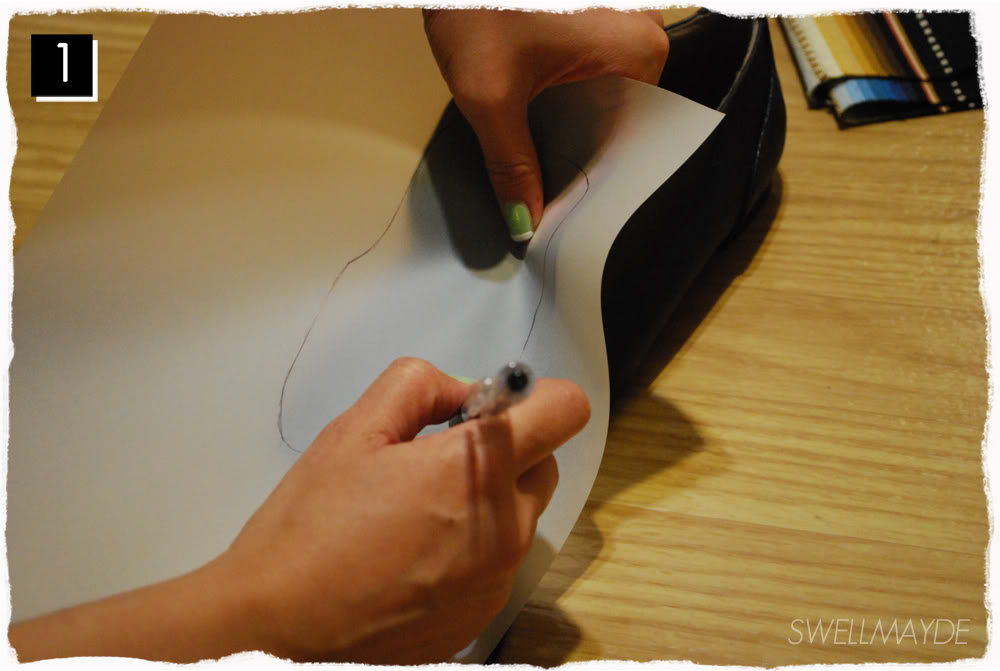
1. Trace the region of the shoe you would like the fabric to be placed on.
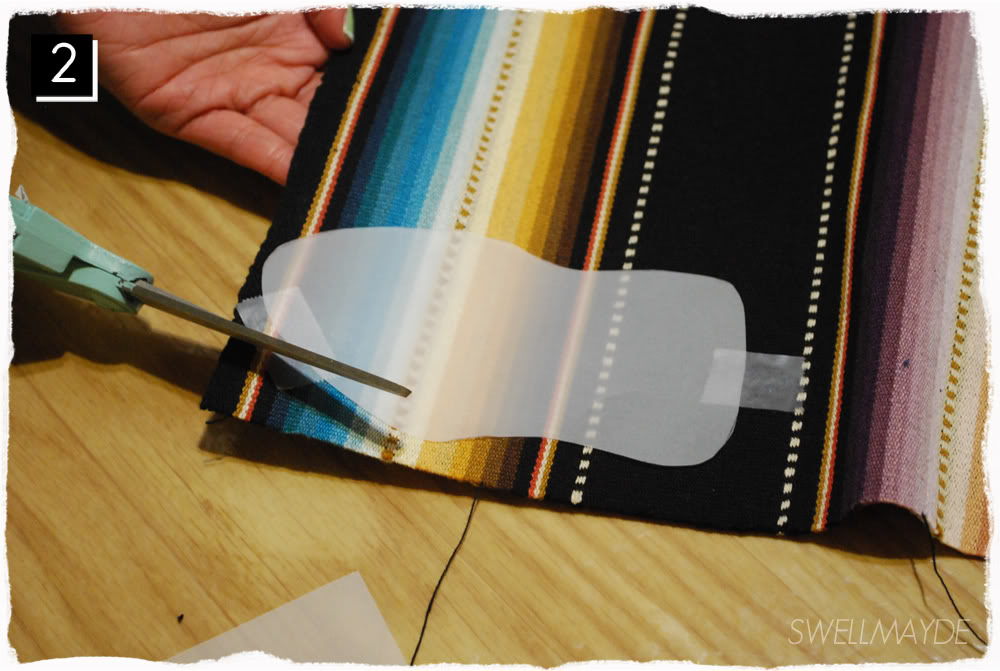
2. Cut out the drawn pattern. Tape the pattern onto the fabric and cut out.  Remember to do a left and right side.  Using a sewing machine, sew a topstitch around the edge of the cut fabric shapes.
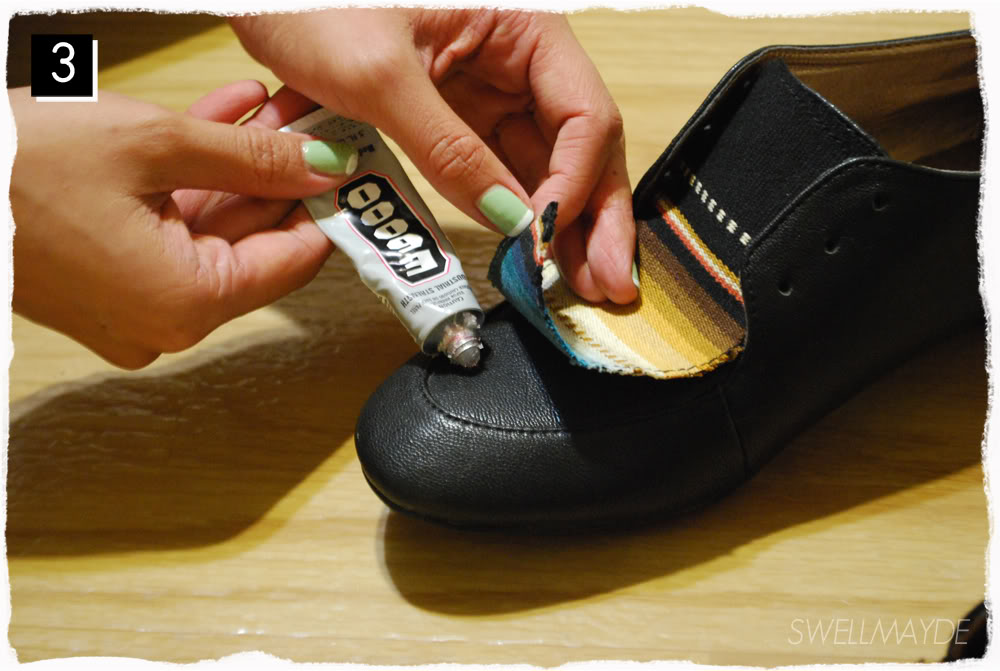
3. Glue fabric onto the shoe using e6000.  There you go!  Easy breezy!!  SwellMayde serape shoes!

DIY: Painted Rhinestone Necklace

model1-3.jpg

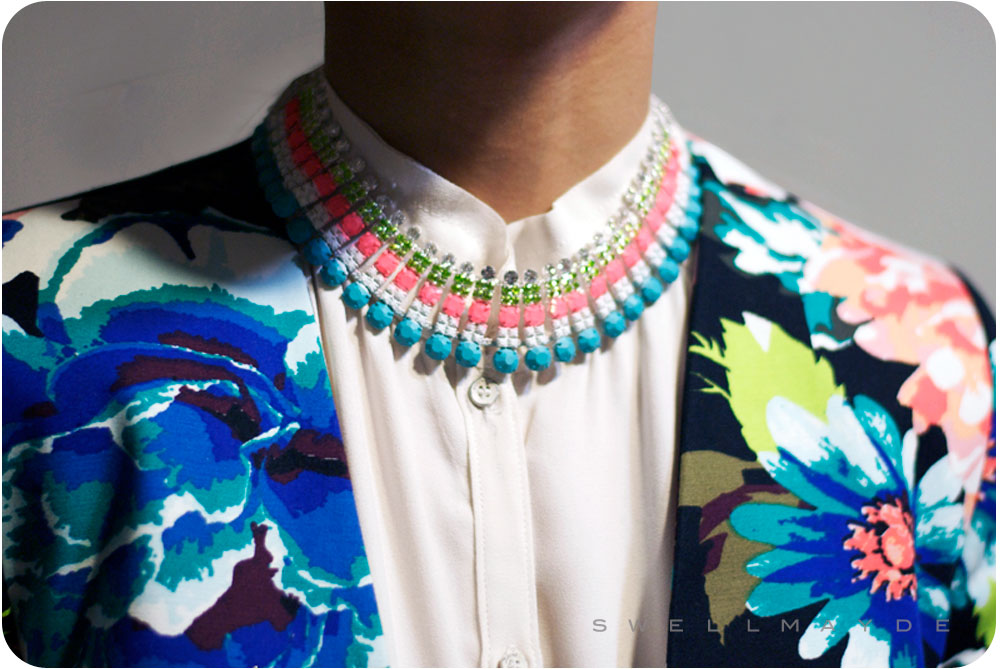
I love the idea of adding some color into my wardrobe for Spring. The easiest way to do so is with accessories. When I saw these necklaces from Tom Binns, I immediately knew what my next DIY would be. The DIY steps are simple and allow you to update a rhinestone necklace that may have been sitting in your drawer since prom.

materials-3.jpg
step1-9.jpg
step2-9.jpg
step3-9.jpg
model2-1.jpg

Materials:

Spray Paint

Scrap Paper

Permanent Markers

Rhinestone Necklace (Similar 

Here

 and 

Here)

Scissors

Masking Tape

Steps:

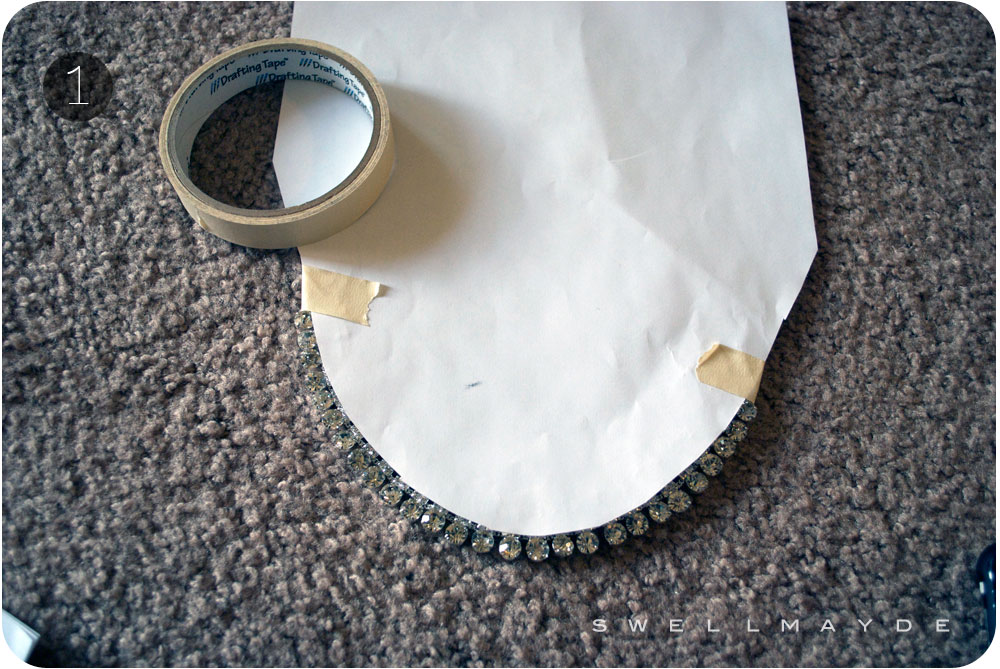
1. Cut scrap paper to cover areas of necklace that you do not want to spraypaint. Tape paper in place.

2. Spray paint necklace to desired color. This will give a more opaque look. Repeat steps 1 and 2 for different sections of the necklace to create a fun color combination.

3. Marker in certain sections with the permanent markers to achieve a colored, yet translucent look.

4. Easy breezy!! Enjoy your SwellMayde DIY Painted Rhinestone Necklace.

DIY: Wire Heart Ring

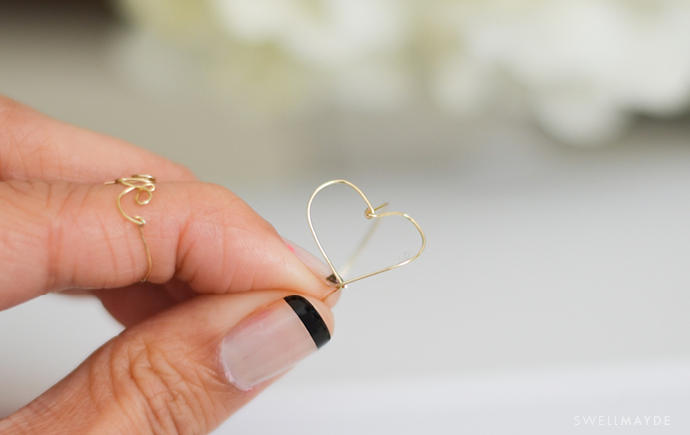
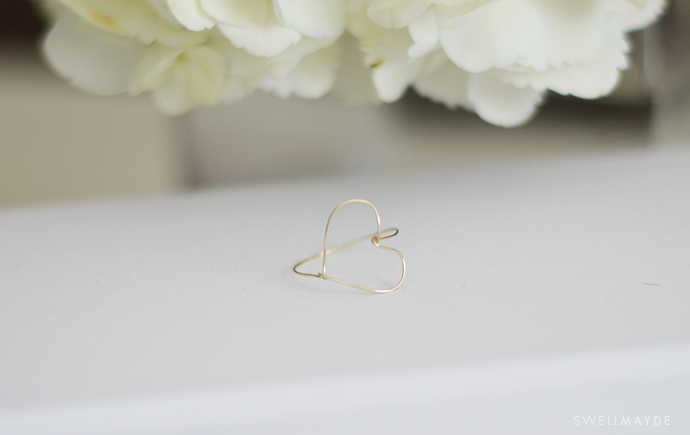
How beautiful is a delicate wire ring? I love stacking them together and even pairing them against opposites, like our chunkier DIY Geode Ring. With Valentine's Day just around the corner, I wanted share this gorgeous wire ring in a delicate heart shape. So perfect for gifting to your loved ones! Make one or ten!

Materials:

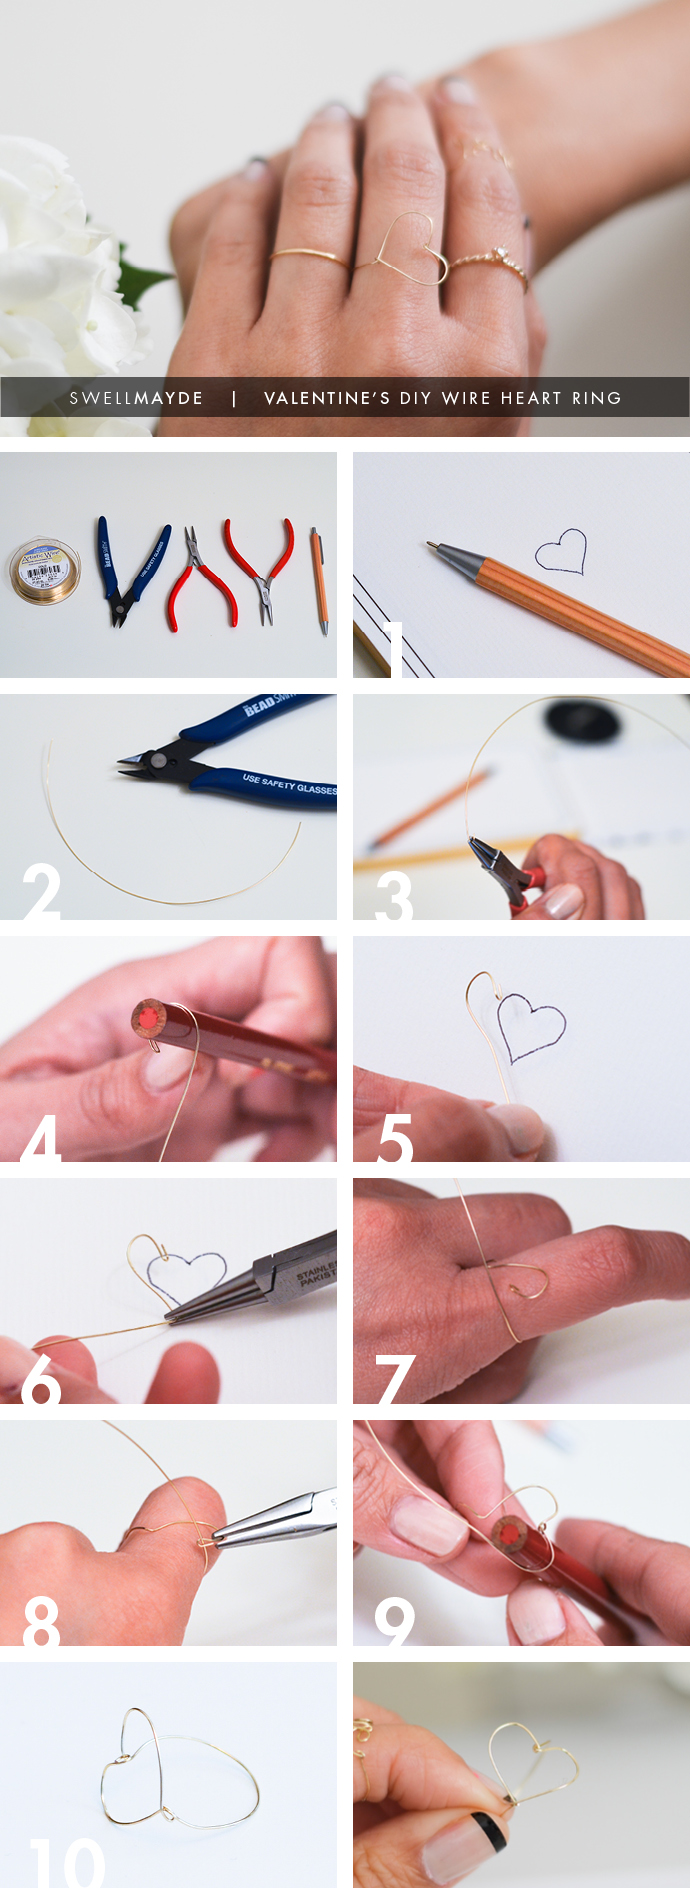
- 24 or 26 gauge wire - wire cutter - flat nose pliersround nose pliers - pen - paper - thin cylinder object like a sharpened color pencil

Steps: 1. Draw a small heart about the width of your finger or smaller. 2. Cut a piece of wire about 6" long. 3. Curve up one of the wire using the round nose pliers, and close it using the flat nose pliers. 4. Using a thin cylinder object (try a colored pencil... I ended using the angled portion of sharpened colored pencil, which created a smaller heart), curve the wire around to mimic the round part of the heart you drew. 5. Straighten out the the wire below the curve to look like the heart your drew. 6. Using your drawn heart as a guideline, angle the wire backwards, with your round nose pliers, where the point of the heart is. 7. Curve the wire around your finger, making sure the half heart is sideways (like photo). 8. Loop the wire through the curved loop you made in step 3. 9. Angle the wire using your round nose pliers to create the invert point at the top of the heart, then curve the other side of the heart to mirror the prior half. 10. Make a loop to create the bottom point of the heart and to connect the ring together. Close the loop using the flat nose pliers.

DIY: Polka Dot Jeans

PolkaDot.jpg

I am a denim fanatic and am always on the lookout for great new styles to add to my wardrobe.  When I saw this adorable pair byMarc Jacobs, I knew what my next DIY would be.  I love that he used a light washed denim with distressing; it is such a fun and refreshing take on polka dots.

PolkaDot3.jpg

Materials:

- Mossimo distressed denim (here) - 3/4" circle sponge brush (here) - Tulip fabric paint (here) - paper plate - ruler

 Steps: 1. Add about one tbsp of water to 3 tbsp of white fabric paint on a paper plate.  I chose to water the paint down a bit to match the look of the washed out denim. 2. Mix the paint and water together and dip your circle sponge brush into the paint mixture. 3. Press the circle sponge brush onto the denim. I painted the first dot at the front side of the denim, near the belt loops. 4. Measure the next line of polka dots. Mine are about 3" apart horizontally and 1 1/2" apart vertically. 5. Continue to paint the dots all over the front side. Let dry for a couple hours, then paint the back side. Let fully dry. It is important to set the fabric paint, if you plan on washing the jeans later. Once the dots are fully dry, set the iron on medium and run across the front and back side of the pant a couple times. Remember to constantly move the iron, and not to use steam.

PolkaDot2.jpg

DIY: Rhinestone Chain Bracelet

ChainBracelet3.jpg

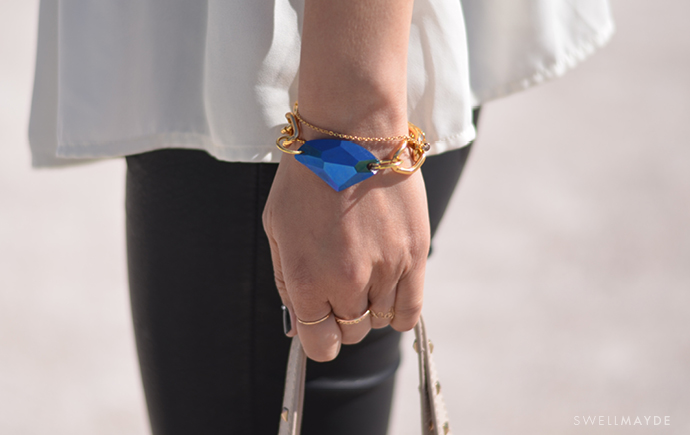
I am a believer that a statement piece can really make an outfit. And with my current love of rhinestone embellishment, I wanted to create a piece of jewelry that could serve this purpose. Here, I show you how to use beautiful large rhinestones to create a chain bracelet that I have been wearing non-stop.  I especially love it paired against delicate pieces.

ChainBracelet2.jpg

Materials:

- 1 large sew-on rhinestone (similar 

here

,

 here

, and 

here

)

- 4 large jump rings

- chunky chain

- large lobster claw

- wire cutter

Steps:

1. Cut two lengths of chain using the wire cutter about 2.5 to 3".

2.  Add a jump ring to one end of each cut chain.  Before closing the jump ring, also loop the jump ring through the holes in each each of the large rhinestone.

3. At the end of one of the chains, add one jump ring.  At the other end, add one jump ring and a lobster claw.

ChainBracelet.jpg

DIY: Studded Clear Clutch

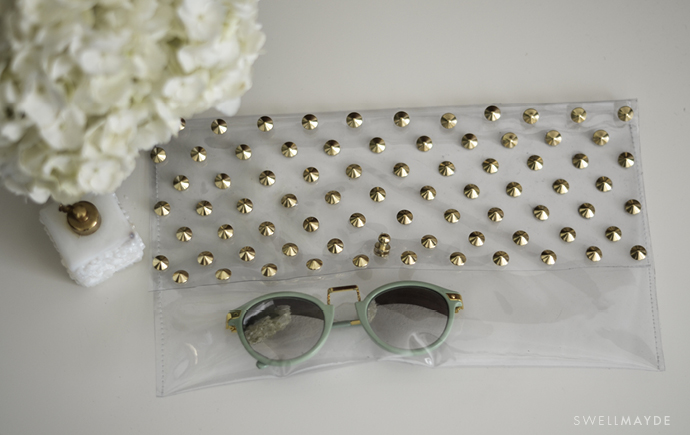
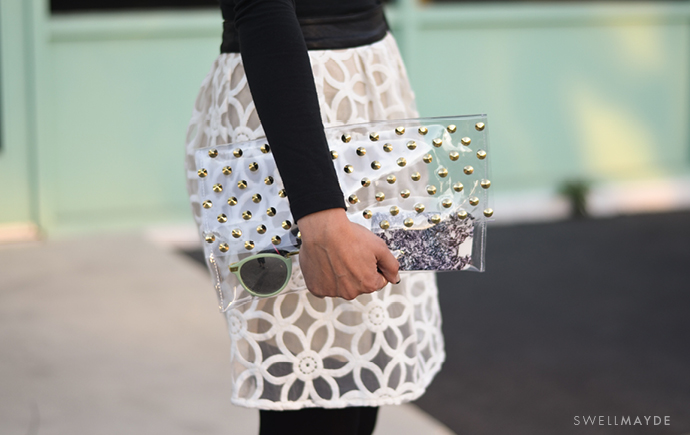
There is something so beautiful about the minimal look of a clear clutch. I love that it also forces me to declutter my purse and only carry my essentials... absolutely the theme of 2013 for me. When I saw this beautiful style from Nasty Gal, I immediately knew what my next DIY tutorial would be.

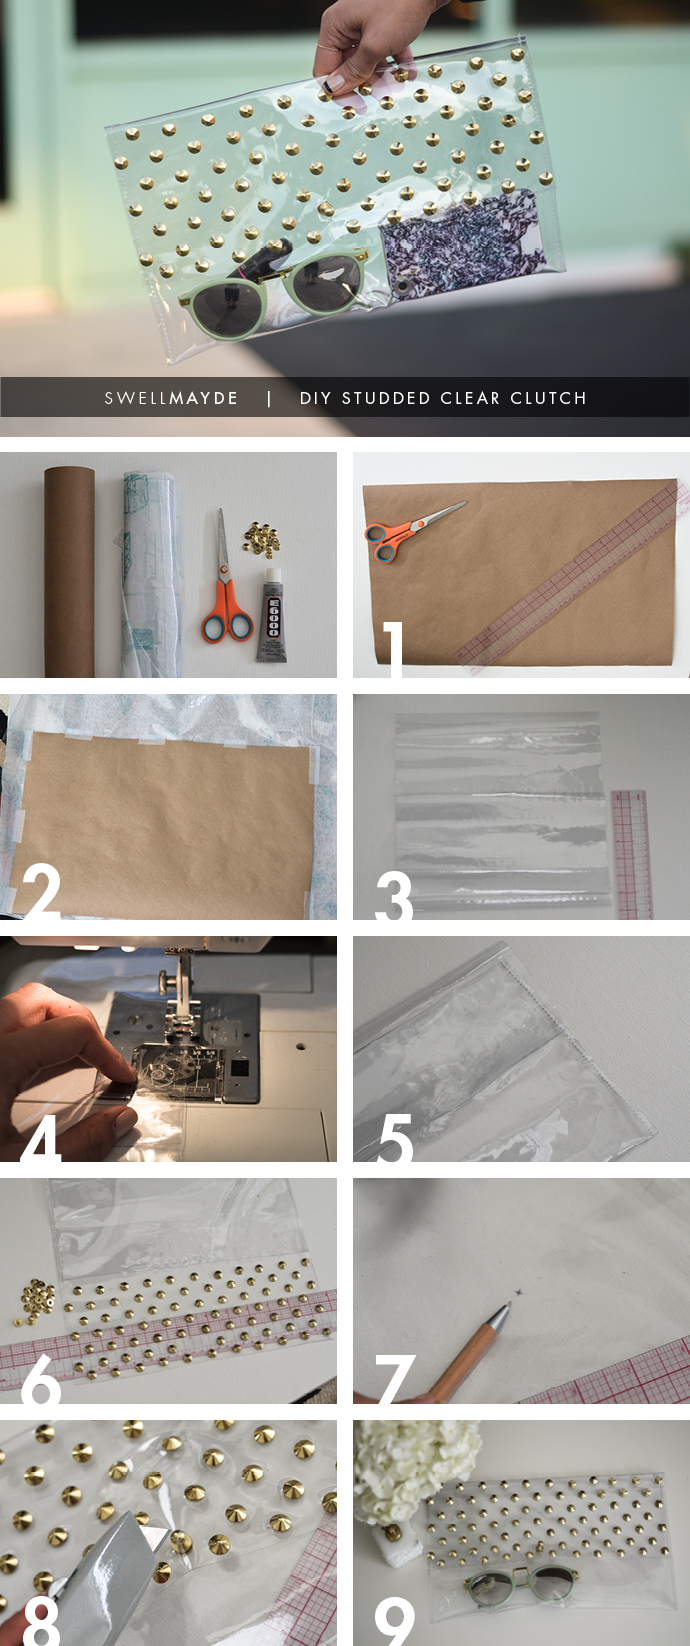
Materials: - large paper (even use the back side of wrapping paper) - clear vinyl - button studscissorsstudse6000 glue  - bbq stick or wooden chopstick - ruler - scotch tape - sewing machine - sewing thread

Steps: 1. Cut a piece of paper: 12" x 19". This will be your paper pattern. 2. Tape your pattern onto the clear vinyl. 3. Fold the bottom piece up 7". 4. Sew the left and right side that you folded up 7". 5. The unfolded/unsewn part is the flap of the clutch. 6. Glue studs to the outside of the flap. Try putting a small amount of e6000 on a paper, and add glue to the stud using a bbq stick or wooden chopstick. The trick to keeping the stud layout very even, is it to place the ruler underneath as a guide for straight lines. Please note to keep a small area free of studs, for placement of the button stud (the closure of your clutch). I placed my 1" up, centered from the bottom edge of the flap. 7. Draw a very small X or dot onto the top layer of the clutch for the placement of the button stud. Have it located directly below the area you left without studs on the flap. It is important that these match up. Cut a very small X where you put the mark. Screw in the button stud here. 8. Now, close the flap and cut a small slit where the button stud lands. This is so that you can open and close your clutch.

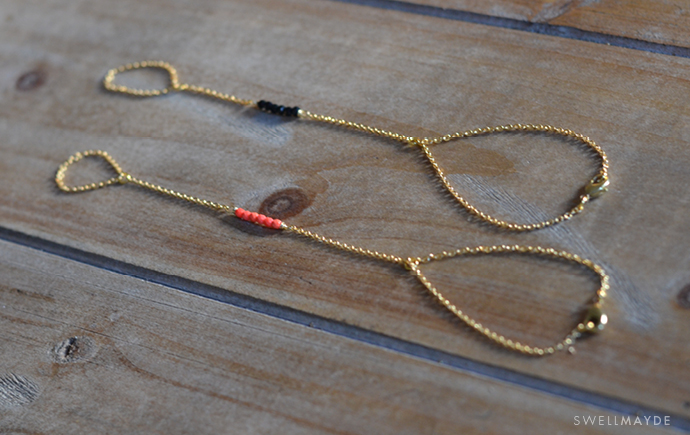
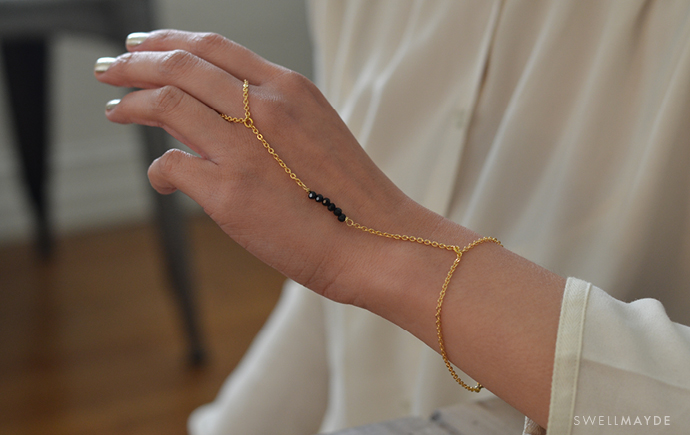
DIY: Delicate Hand Chain

Last month, I hosted my very first Instagram contest (@swellmayde) where I asked everyone to post DIY inspiration that they wanted me to create a tutorial for. There were so many amazing entries, from a studded leather bowtie to embellished sweaters and shoes. It was difficult to choose the winner, but in the end, I couldn't quite stop thinking about this beautiful hand chain that @KatBerry8 posted. I love how delicate it is and that it can become the standout piece in your outfit.

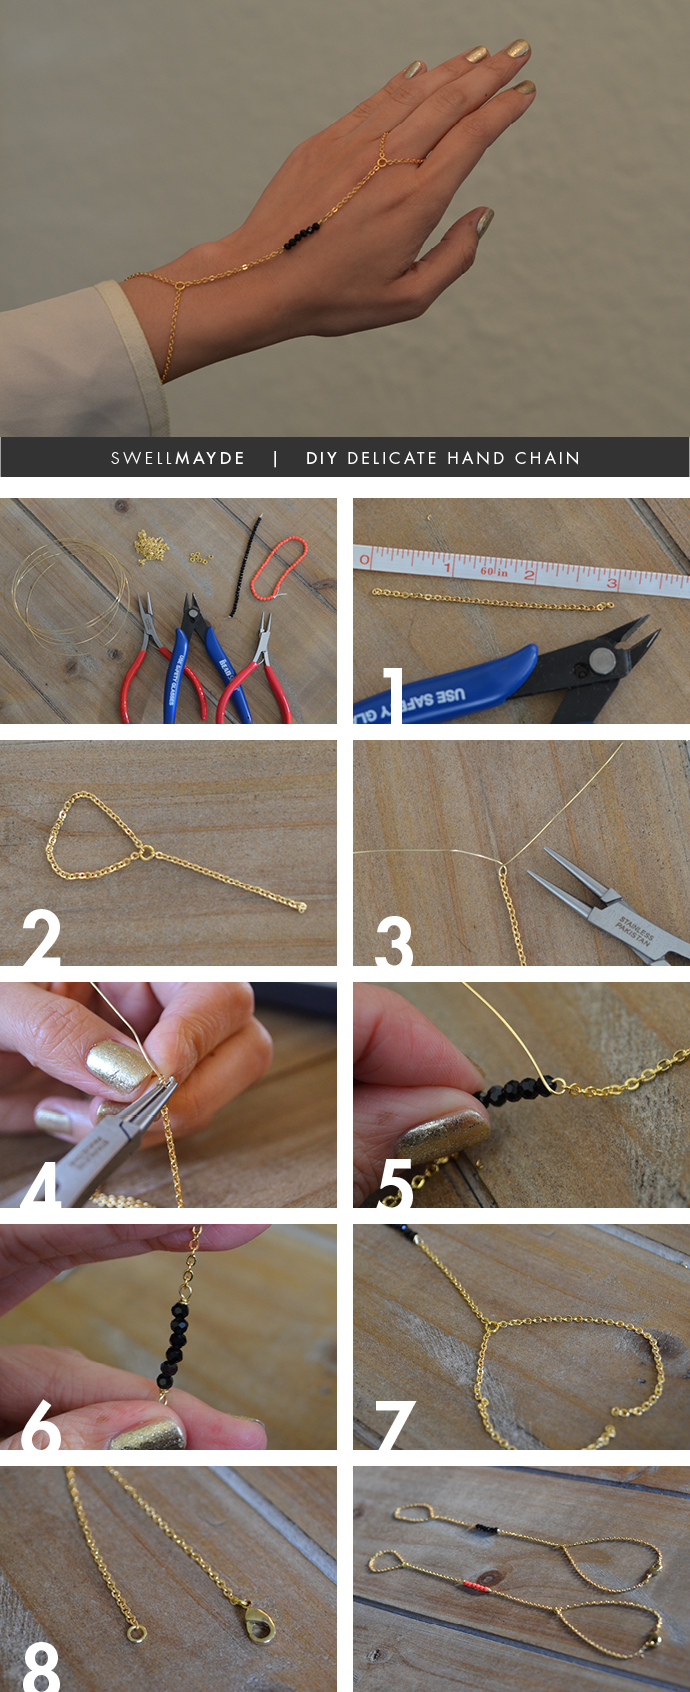
Materials: - delicate chain - beads - thin beading wire - lobster claw - 4 small jump rings - needle-nose pliers - round-nose pliers - wire cutter - ruler/measuring tape

Steps: 1. Cut several lengths of the delicate chain at 1 1/4", 1 3/4", 3", and 2 x 3 1/4". 2. Take the 3" chain and loop both ends onto a small jump ring. Also loop one end of the 1 1/4" chain. Close the jump ring with the needle-nose pliers. This creates the ring section. 3. Cut a piece of wire about 6" long. It is good to use a piece that is longer than needed, so that it is easier to handle. Loop the wire through the end of the 1 1/4" chain. Then, wrap the wire around the round nose plier, with one end of the wire about 1 1/2" long, like photo. 4. Stick one side of the round-nose pliers into the wire loop you just created. Then, take the shorter end of the wire and wrap around the loop you created (at least 2 times). Cut excess wire. This video is helpful to visualize (here). 5. String about 3/4" of beads through the longer end of the wire, then create a loop with the wire and round nose pliers (like prior). String the 1 3/4" chain into loop your created. 6. Stick one side on the round-nose pliers into the wire loop, to hold it in place. Take the loose end of the wire, and wrap around the loop (at least 2 times). Cut excess wire. 7. Add a small jump ring to the end of the 1 3/4" chain. Also, loop in one end of each 3 1/4" chain. Close the jump ring with the needle-nose pliers. 8. Add a small jump the end of one of the 3 1/4" chain. then, add a small jump ring and lobster claw to the end of the other 3 1/4" chain. This creates the bracelet section.

A big congrats to KatBerry8 on winning the hand chain.  Thank you to everyone who entered!  Next DIY Inspo contest coming soon!!!

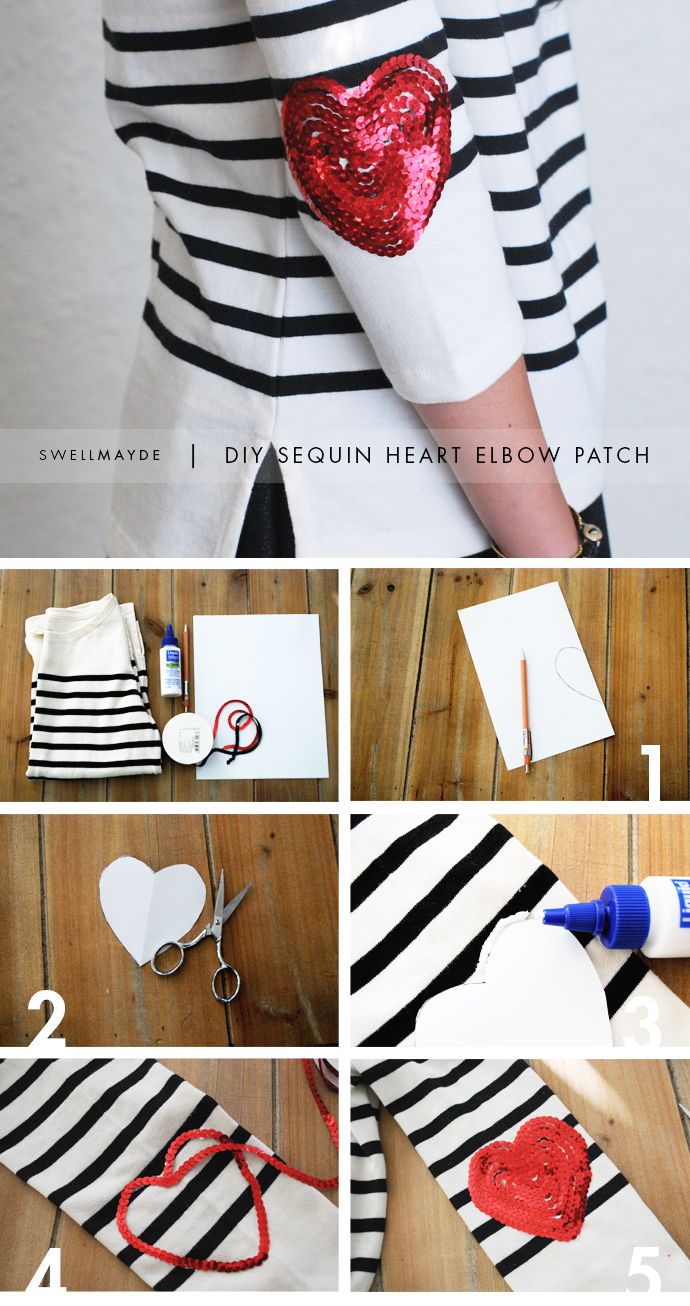
DIY: Sequin Heart Elbow Patch

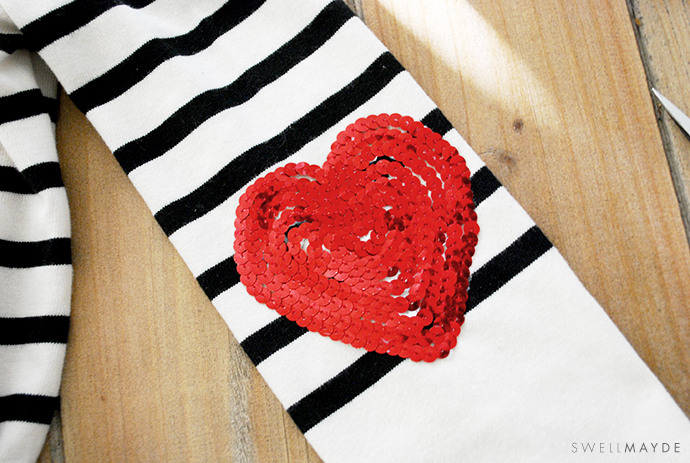
I recently looked into my closet and realized that I have more black and white striped tops than I remembered ever buying. I guess it's fine, since it really has become my uniform (here). But, so I don't have a constant "Doug" moment, I wanted to figure out a way to update them in a cute way. Thankfully, Pinterest provided great sources of inspiration. Here's how to add a sequin heart elbow patch to any top or sweater.

Materials: - striped top (here) - 3 1/2 yds sequin trim (here) - liquid stitch (here) - scissors - copy paper - pencil

Steps: 1. Fold the copy paper in half. Draw half of a heart about 3 1/4" tall. 2. Cut out the heart. 3. Place the paper heart on top of the sleeve, where your elbow would land. This should be at the center of the sleeve, about 9 1/2" from the armhole seam. Add a thin line of liquid stitch around the paper heart. Then, remove the heart. 4. Place the sequin trim on top of the liquid stitch. 5. Continue adding a thin line liquid stitch and placing the sequin trim on top until the whole heart is filled with sequins. Repeat for the other sleeve.

Halloween DIY

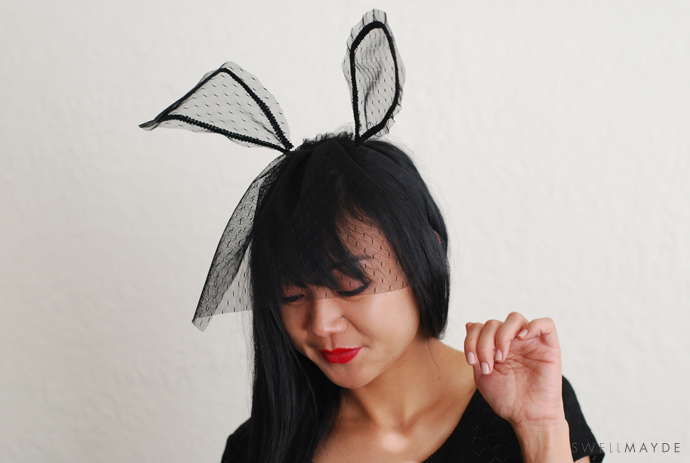
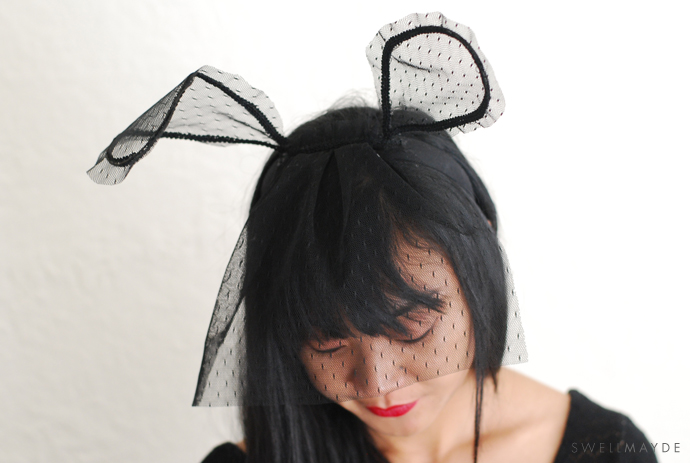
Having just moved into a house after years of living in an apartment, I'm looking forward to passing out candy to the kiddies in our neighborhood this Halloween. I'll be wearing this little DIY all night. Please check out the full tutorial after the break, along with suggestions on what to wear to complete the look.

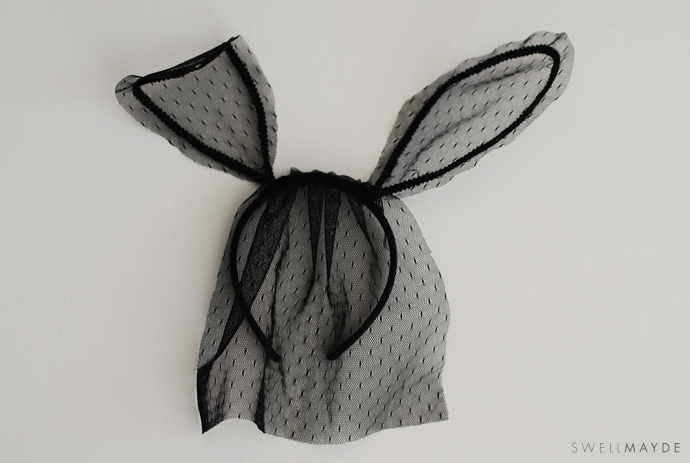
Materials: - tulle - fabric covered headband - e-6000 adhesive - stem wire - thread - sewing needle - 1 1/2 yards of decorative trim (1/4" or 3/8" wide) - scissors - computer paper - black spray paint

Steps: 1.  Spray paint 2 stem wires black.  Once fully dry, twist the ends together 2 times about 1 1/4" from the tips.  Curve them like the photo to look like rabbit ears, trying your best to make the shapes similar. 2. Trace around the curved wire. 3. Add a dotted line around the tracing about 3/8" away. Cut out using the dotted line. 4. The cut out is now your pattern.  Using the pattern, cut two pieces of tulle.  Pin or tape onto the tulle if needed before cutting if needed. 5.  Hand sew the cut tulle onto the wire rabbit ears.  Remember to double knot at the end and beginning. 6.  Repeat step 5 for both ears. 7. Wrap the extra ends of the wire ears onto the headband, towards the top of the headband, about 2 1/2" apart. 8. Add a dab of e-6000 after wrapping the wire around the headband. 9. For the veil, use a piece of computer paper (8 1/2" x 11") as the pattern.  Cut one piece of tulle 8 1/2" x 11". About 1/2" from the edge, use your needle and thread to rouche the tulle. 10. Continue roughing the tulle, until it is about 3" long.  Remember to double knot at the beginning and end of sewing. 11. Using e-6000, glue the decorative trim on the tulle ears to cover the wire. 12. Sew the tulle veil onto top of the headband, in between the ears. 13.  Glue a piece decorative trim at the top of the veil to give it a finished look.  Also, if the ears feel a bit wobbly, you can add a little bit of e-6000 on the inside of headband where the wire is wrapped.  Then, add a small piece of masking tape to hold it in place.  Hold with your thumb for a minute, to lock in the glue, then let fully dry for a couple hours.

To complete the look: Try wearing a black bodysuit (here or here) or a cute fit and flare dress (here).  Then, add a black pom pom as a tail.  Follow the tutorial (here) to create a pom pom!  Enjoy!  And have a fun Halloween!!

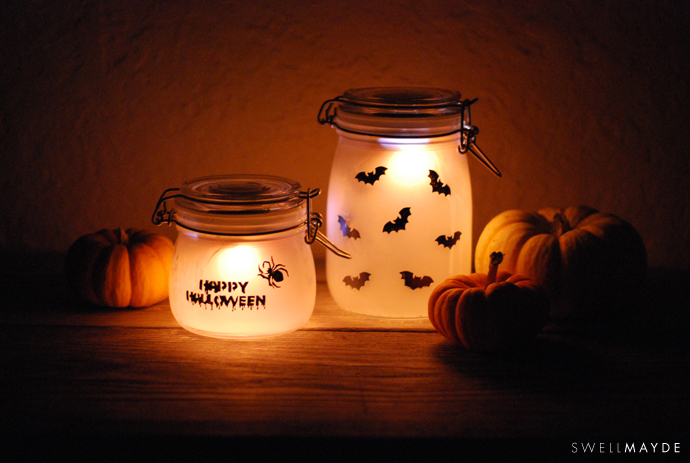
DIY Halloween Sun Jar

Halloween is just around the corner and I am very excited to share this DIY. I wanted to push myself out of my comfort zone of fashion, and get crafty and creative. Thank you to Martha Stewart Crafts for providing a plethora of amazing supplies to get my creative juices flowing. After gathering a few inspiration ideas together, I am really happy I decided on this Halloween themed sun jar.

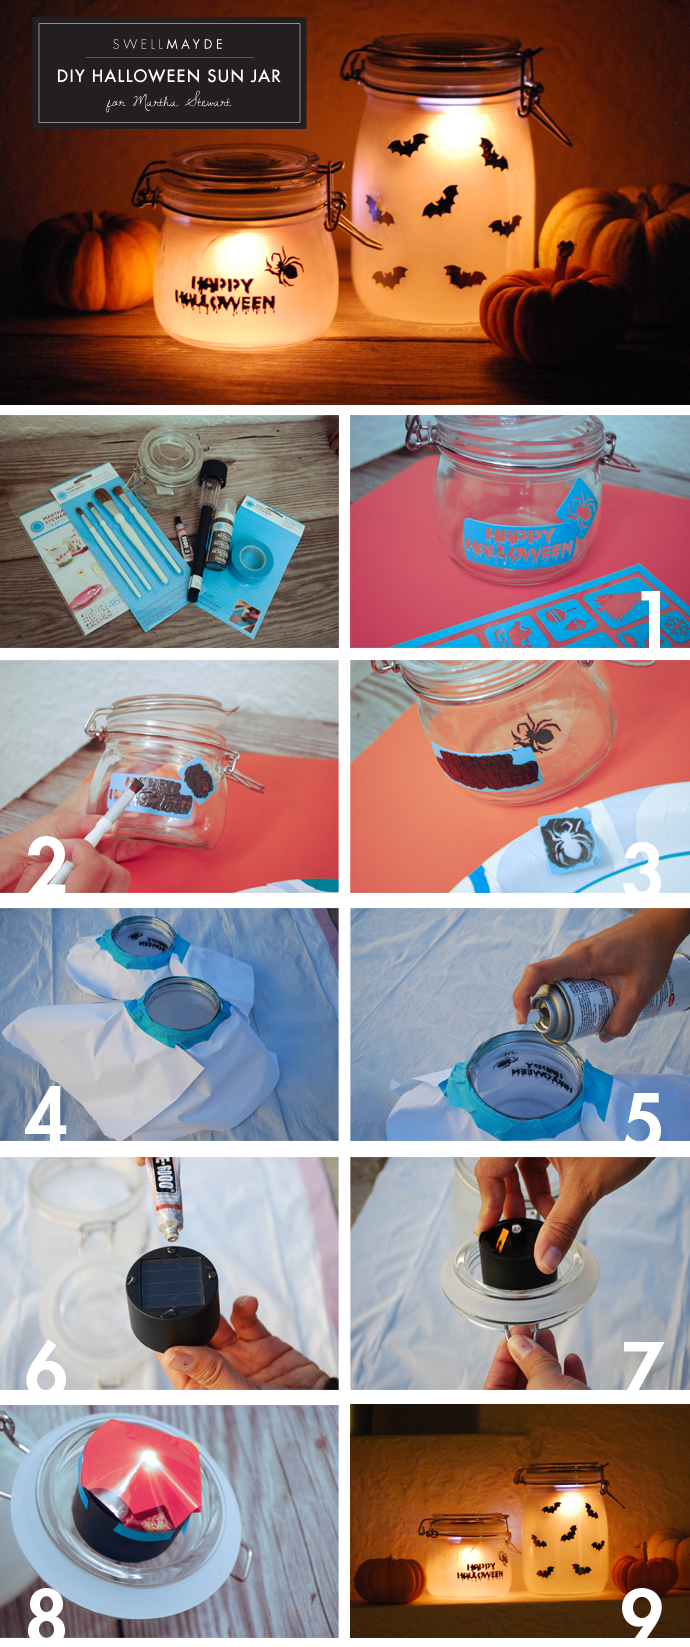
Materials: - Glass Jar (here) - Solar Panel Lamp (here) - Can of Frosting Spray - e6000 adhesive - Martha Stewart Crafts: Holiday II Adhesive StencilsMetallic Opaque Glass Paint in Black NickelBristle BrushesStencil Tape

Steps: 1. Apply the adhesive stencil onto the outside of the glass.  Use several different stencils to create a dynamic look. 2. Using a brush, paint on top of the stencil.  Be sure not to paint beyond the outer edge of the stencil and if using the same stencil multiple times, be sure wipe off any excess paint on the stencil before placing it onto a new position.  Do not add too much paint.  Add a light coat, then add a 2nd if necessary. 3. Carefully peel off the adhesive stentils (while the paint is still dry). 4. Cover the outside of the jar using paper tape. 5. Spray the inside of glass jar with frosting spray evenly (one continuous spray to prevent uneven look). 6. Remove the top of the solar panel lamp.  Add a bit of e6000 to each side of the solar panel base, but to not add any glue to the actual solar panel. 7. Place of the inside lid of the jar.  Let dry for at least 1 hour. 8. To give it a orange glow,  I cut a square large enough to cover the light bulb area of the solar panel lamp from a plastic Reese's candy bag and taped it in place.

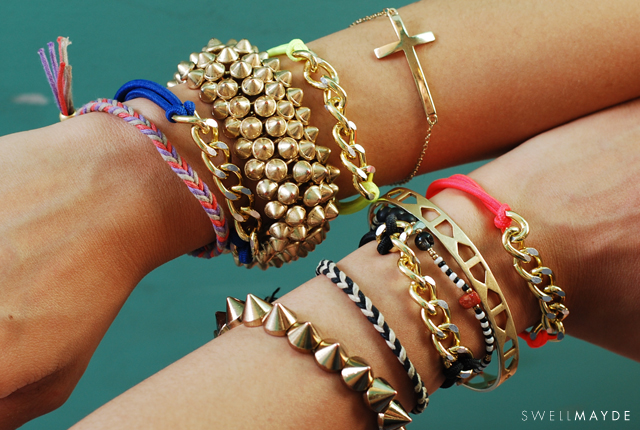
DIY: Chain Link Bracelet

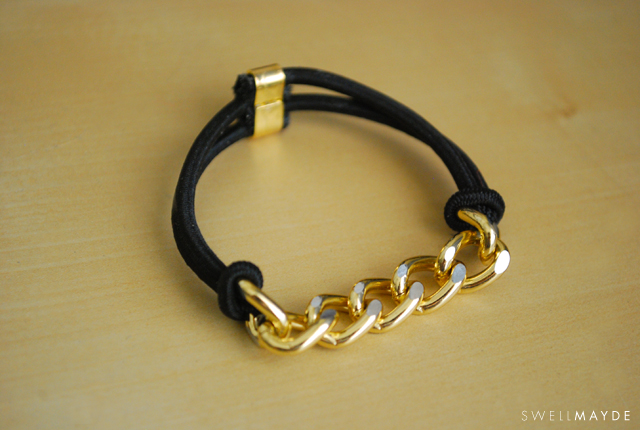
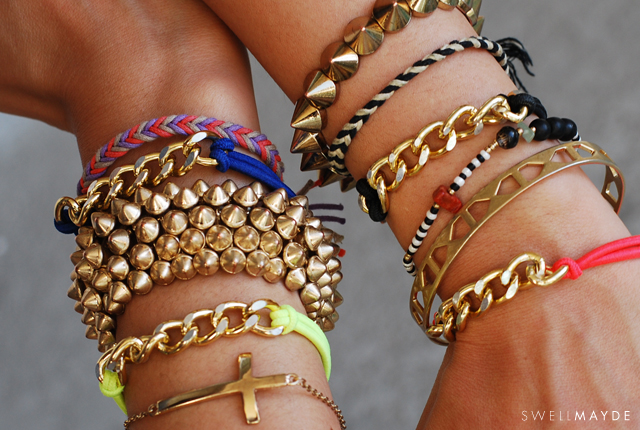
I have been really inspired by chain bracelets lately.  Here is the first of 2 chain bracelet DIY's. When I saw this beautiful Marc Jacobs bracelet (here), I instantly knew what my next DIY would be. I love the gold chain against the elastic band. It feels chic, yet casual. Here's how to make your very own. Pretty easy peasy! Full tutorial after the break...

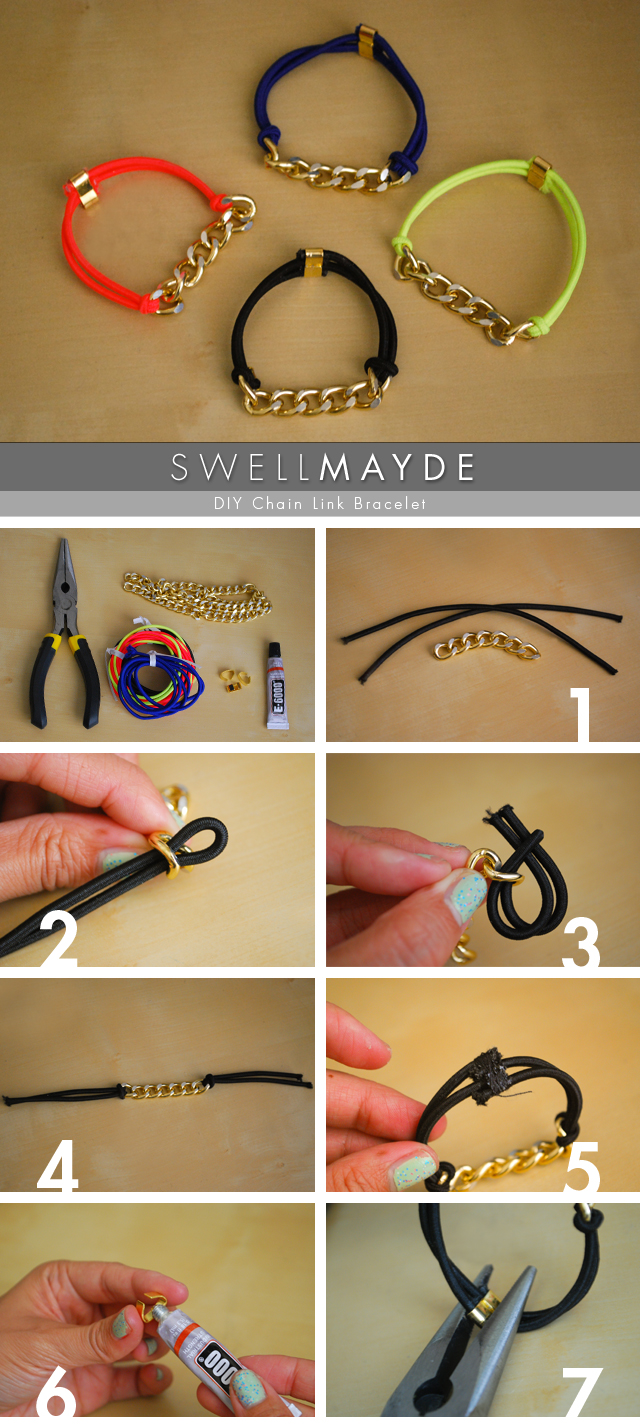
Materials: - elastic rope (here) - chain (similar here) - clamp (bought from Athenian Fashions) - pliers - sewing thread - e6000 adhesive

Steps: 1. Cut the 2 length of elastic rope (about 5 1/4" to 6" depending on your wrist size). Then, cut 1 piece of chain about 2" long. 2. Fold one cut elastic rope and fold in half. Loop through one end of the chain. 3. Take the two ends of the elastic and put through the loop. 4. Pull the two ends of the elastic tightly. Repeat steps 2 through 4 for the other elastic rope. 5. Hold all 4 ends of the elastic rope, add a dab of e6000, then wrap tightly with sewing thread. This will keep all the ends in place. 6. Add a small dab of e6000 onto the inside of clamp. 7. Place the clamp onto the wrapped ends. Tightly squeeze each side of the clamp using the pliers to secure the ends of the elastic rope.

DIY: Distressed Denim

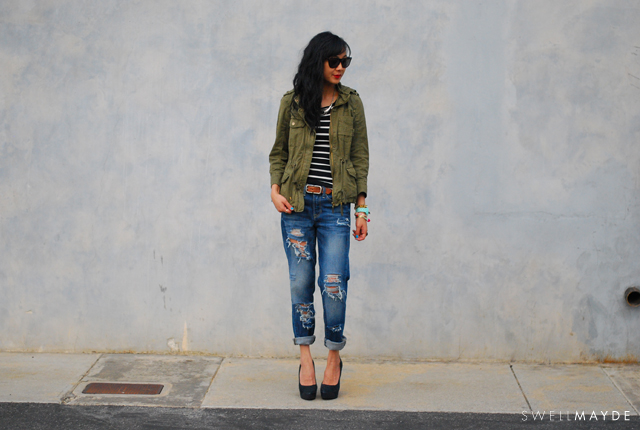
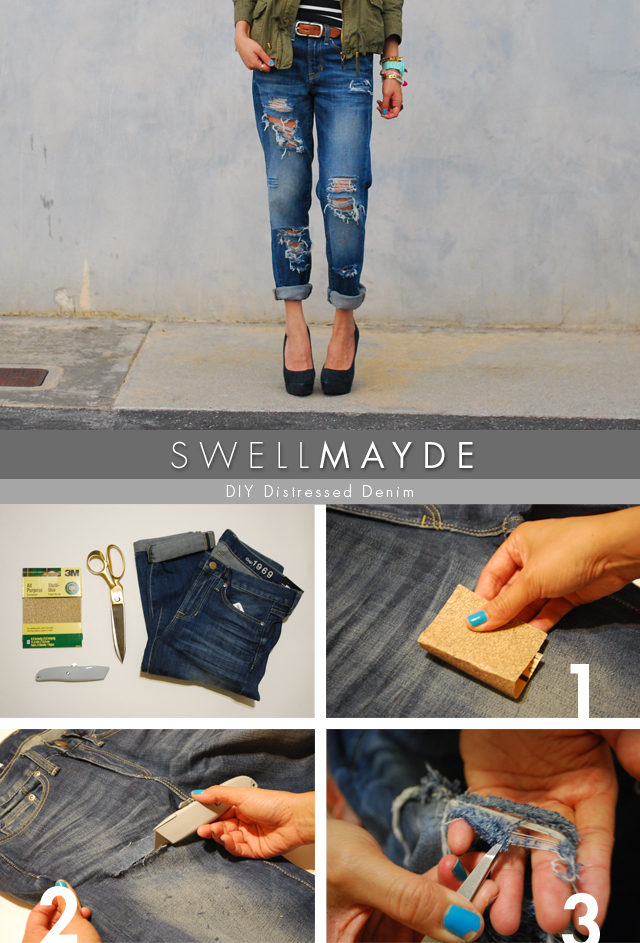
I have been a denim lover practically my whole life. As a child, I lived in my Jordache and Guess jeans, and as I've grown older I've come to appreciate denim in a whole new light. It really has become my favorite canvas and I love that with different treatments and techniques, it can become something very new and fresh.

Materials: - denim jeans - sandpaper - utility knife - tweezers - cardboard

Steps: 1. Rub sandpaper several times over the area you would like to add distressing to. 2. Cut straight horizontal slits into the denim about 1/2" apart to the front side of the denim in areas where you rubbed sandpaper on. (Tip: Add a piece of cardboard inside the pant leg of where you are cutting to prevent cutting through to the backside of the jean). Once you have a layout that you like, throw the denim into the washing machine using cold water. Then, fully dry in the dryer. 3. Once it is out of the dryer, you can make the distressing look a little more natural. Using the tweezers, in areas where you cut slits, pull the indigo fibers, leaving the white horizontal fibers.

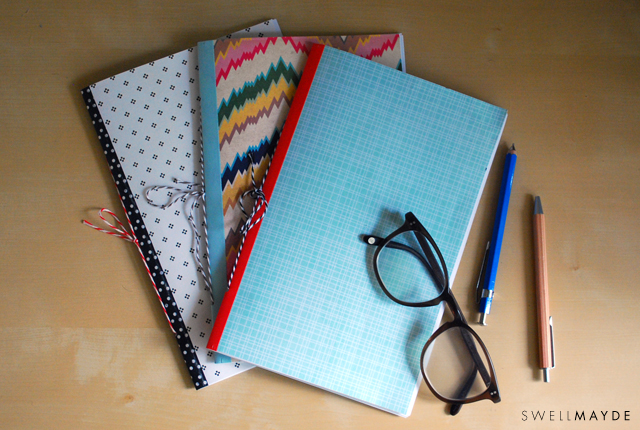
DIY Patterned Notebook

I have been pretty obsessed with stationery and notebooks lately, which led me to create this DIY for Unique SF and the Summer Show in Santa Monica.  I wanted to share the easy to follow steps for everyone, especially if you couldn't make it out to one of the events.  Have fun playing with color and patterns!

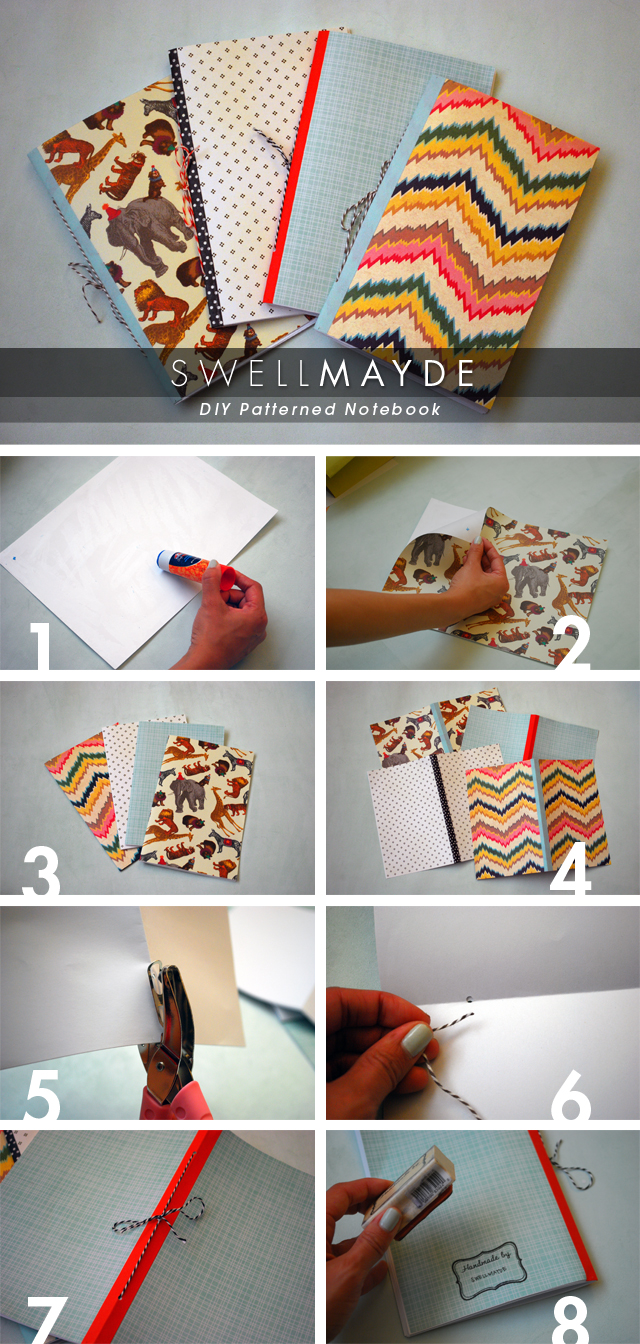
Materials: - 8 1/2" x 11" Patterned Paper (here) - Colored/Patterned Tape (here and here) - Baker's Twine (here) - Hole Puncher 1/8" or 3/16" (here) - Glue Stick (or Spray Adhesive) - Scissors - 8 1/2" x 11 Copy Paper and Cardstock - Rubber Stamp (optional) (similar here)

Steps: 1. Apply gluestick all over the cardstock.  You can also use spray adhesive (be sure to wear a dust mask over your mouth and nose and be a in well ventilated area). 2. Place your patterned paper on the glued cardstock (pattern side up). 3. I used about 8 pieces of copy paper per notebook.  Fold the copy paper and the patterned cardstock in half. For a clean, sharp crease, fold a couple pieces of paper at a time. 4. Add tape to the center of the folded patterned cardstock, as a fun detail.  Cut off excess. 5. Hole punch the folded copy paper and patterned cardstock on the crease, at the top and bottom edge.  Be sure to punch the holes at the same distance each time.  The holes must align. 6. Cut a piece of baker's twine to about 16".  From the inside of the notebook, string one end of the twine through bottom holes.  Then, string the other end of the twine through the top holes. 7. Tie a knot and bow on the outside of the notebook. 8. (Optional) Apply a stamp for a finishing touch!  And you're done! :)

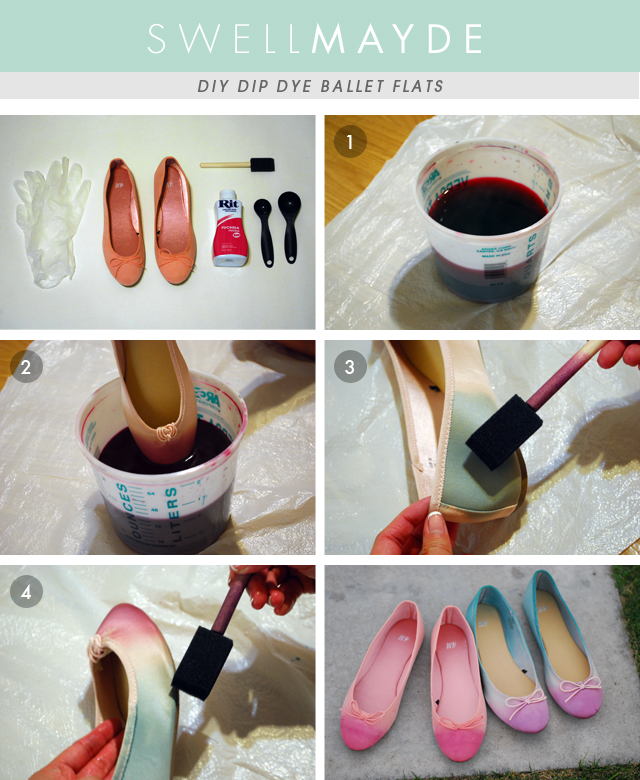
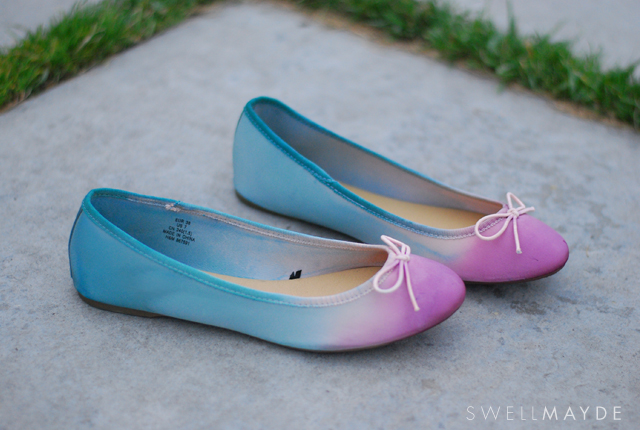
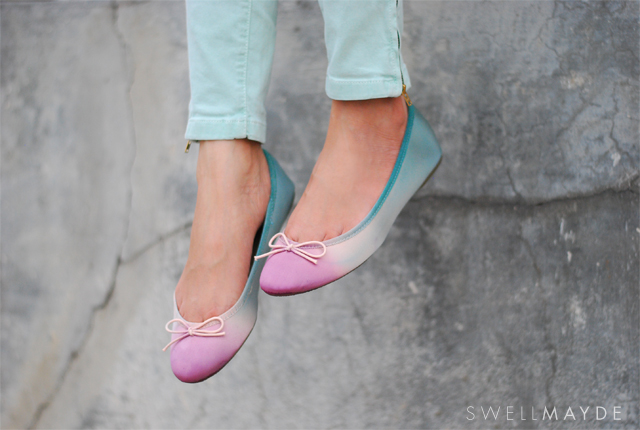
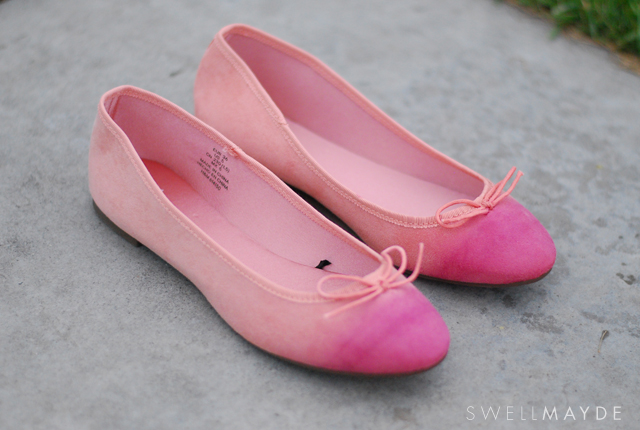
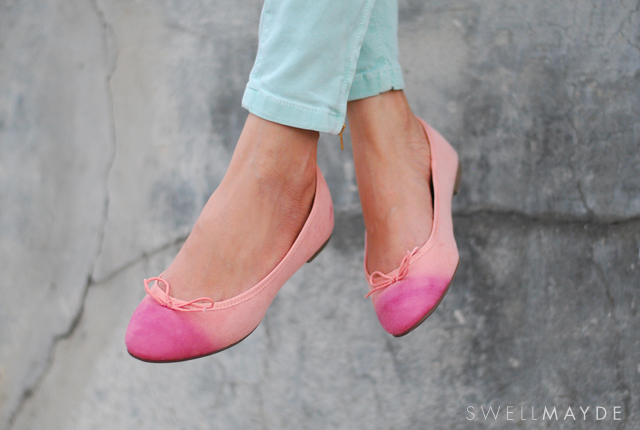
Dip Dye Ombre Ballet Flats

Ombre has definitely become one of my favorite trends of the season and when I discover a new iteration of it, I get really excited and have to emulate it. For this DIY, I was inspired by these beautiful dip dyed ballet flats from Anthropologie. Here's how to create your own...
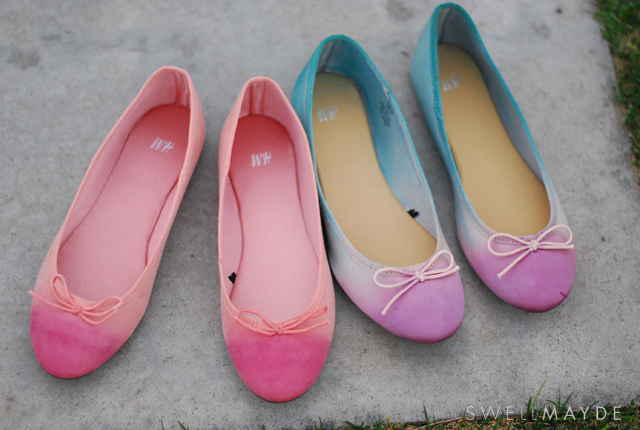
Materials:
- ballet flats (mine are poly satin and faux suede from H&M, but works best with natural fabrics like suede and cotton)
RIT liquid dye ( purple, fuschia, and teal)
- measuring spoons
- gloves
Steps:
1. Create your dye baths. First, boil water. You will need about 4 liters.  For the fuschia dye bath, pour about 1 1/4 liters of water, along with 3 tablespoons of salt into a container. Then, add about 3 tablespoons of fuschia RIT dye. For the purple dye bath, pour about 1 1/4 liters of water, along with 3 tablespoons of salt into a container.  Then, add about 2 tablespoons of fuschia RIT dye and 3 tablespoons  purple RIT dye.  After, for the teal dye bath, pour about 1 1/4 liters of water, along with 3 tablespoons of salt into a container.  Then, add about 3 tablespoons of teal.
2.  If your ballet flat has a bow, you can tape it to the inside to prevent it from dying. Then for the fuschia/pink ballet flat version, quickly dip the front end of the flat into the fuschia dye bath. Then dip only about 1" into the dye bath for a couple minutes, so the tip of the flat is richer in color. Let this dry. For the purple/teal ballet flat version, quickly dip the front end of the flat into the purple dye. Then dip only about 1" into the dye bath for a couple minutes, so the tip of the flat is richer in color.
3.  To finish up the purple/teal version, paint on the teal dye with the sponge brush.  Leave a gap of about 1 1/2" unpainted.
4. Afterwards, run the sponge brush under water until fully clean. Then, paint on water at the edge to smoothen the ombre. Let fully dry.
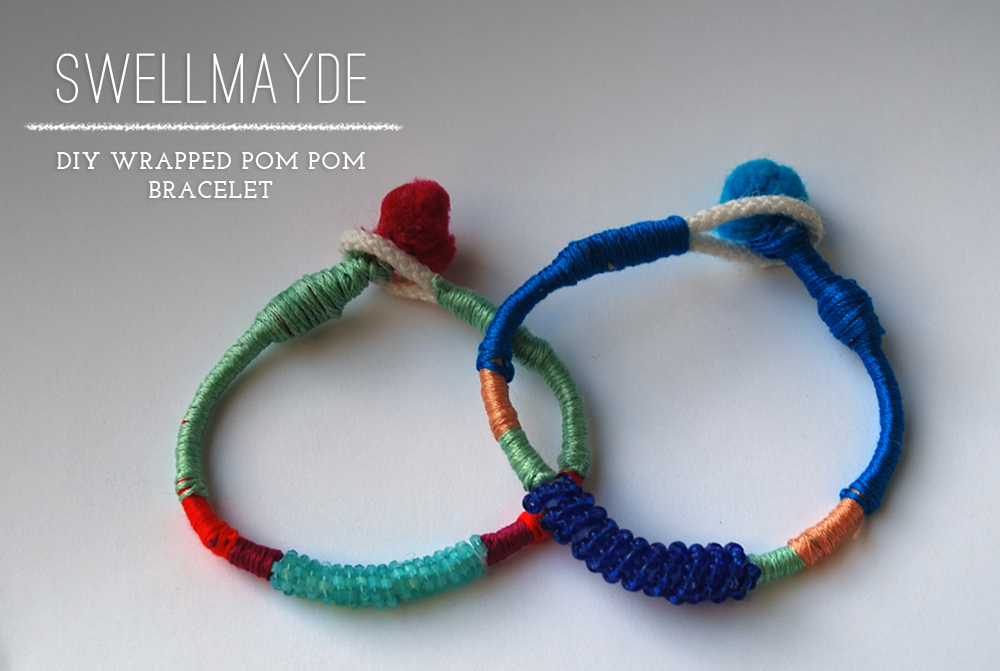
DIY: Wrapped Bracelet

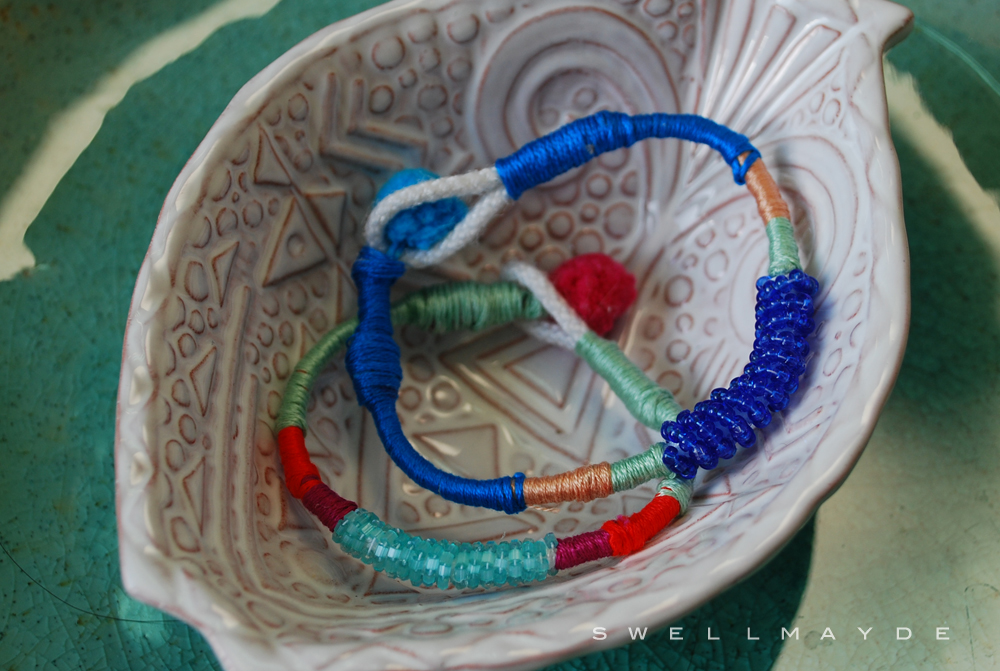
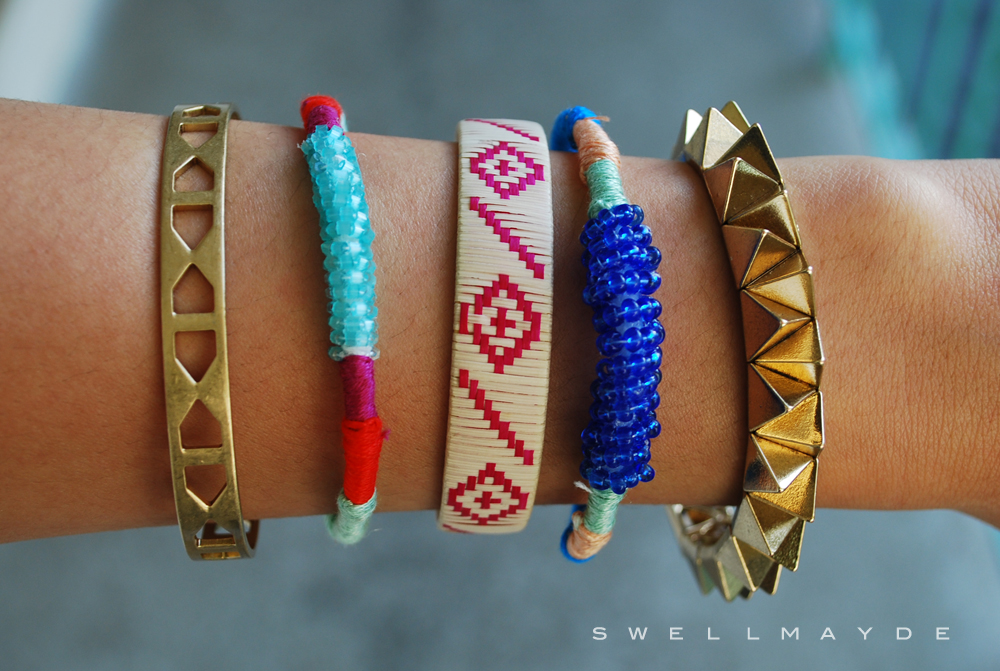
I am a really simple girl when it comes to my style.  My classic "Aimee" uniform consists of a white t-shirt or button-up and cut-offs.  I can basically wear that combination everyday, but what makes it feel different from day to day are the accessories.  My goal is to DIY more of them myself... so when I'm looking down at my arm party, it feels a little more personal.  Here's a fun wrapped pom pom bracelet I recently made.
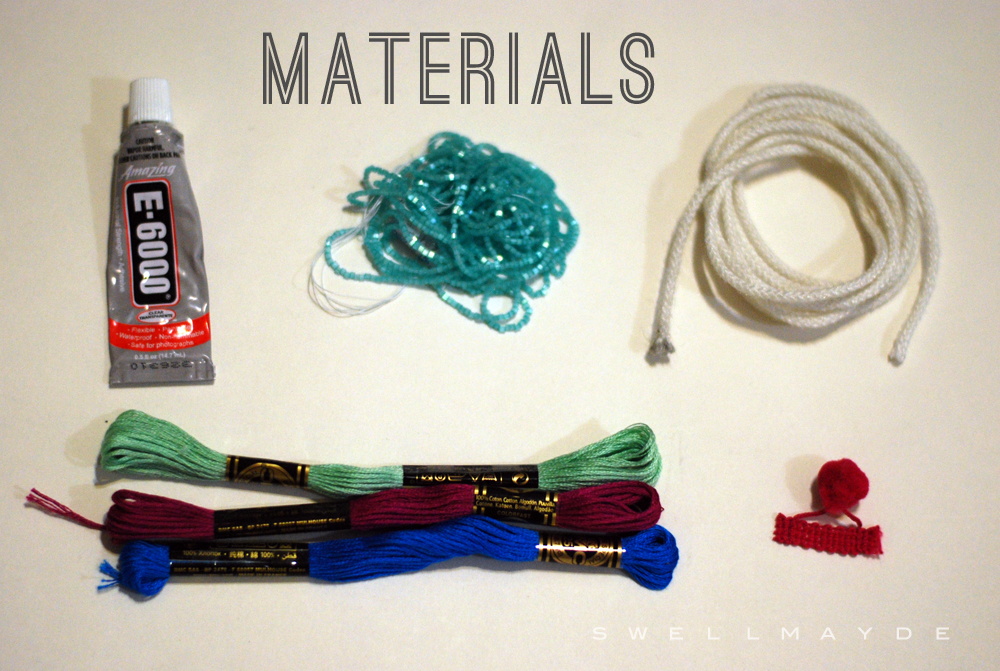
Materials:
- Rope
- Strand of Beads
- E6000 Glue
- 3 Colors of Embroidery Floss
- Pom Pom Trim
- Super Glue
Steps:
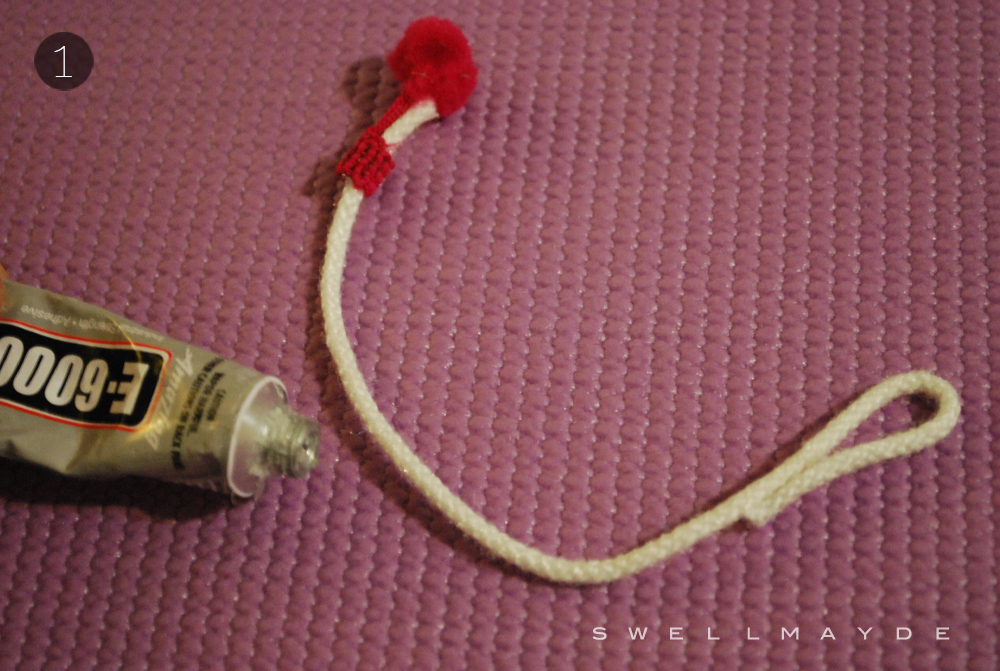
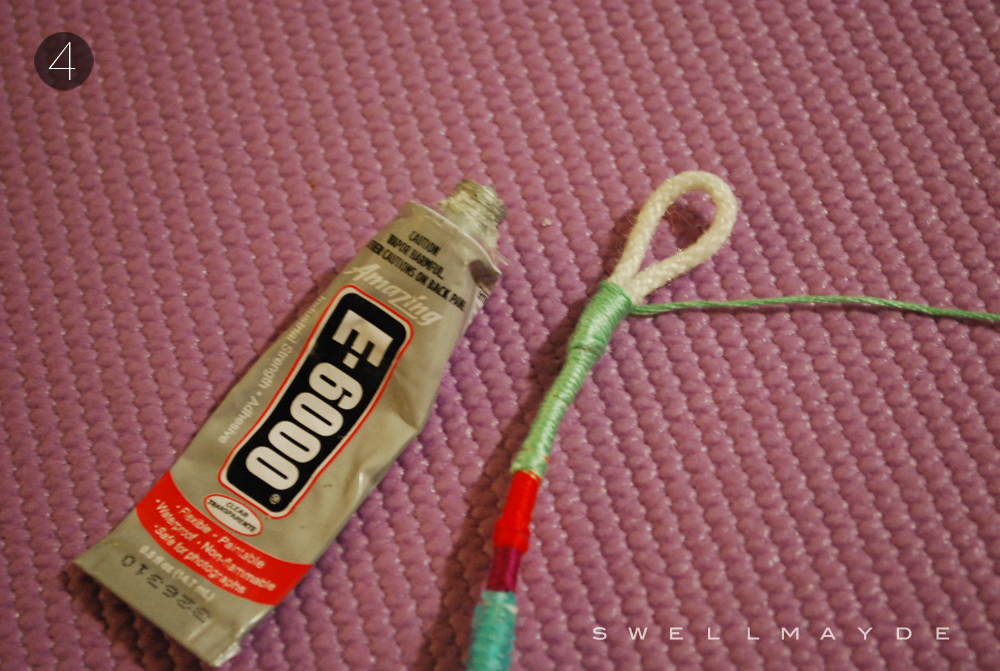
1. Cut the rope to 10" long. Fold one end over 2" and using e6000, glue together leaving a loop large enough for the pom pom to go through. At the other end of the rope, glue and wrap the flat end of the pom pom trim around the rope about 1/2" below the rope tip.
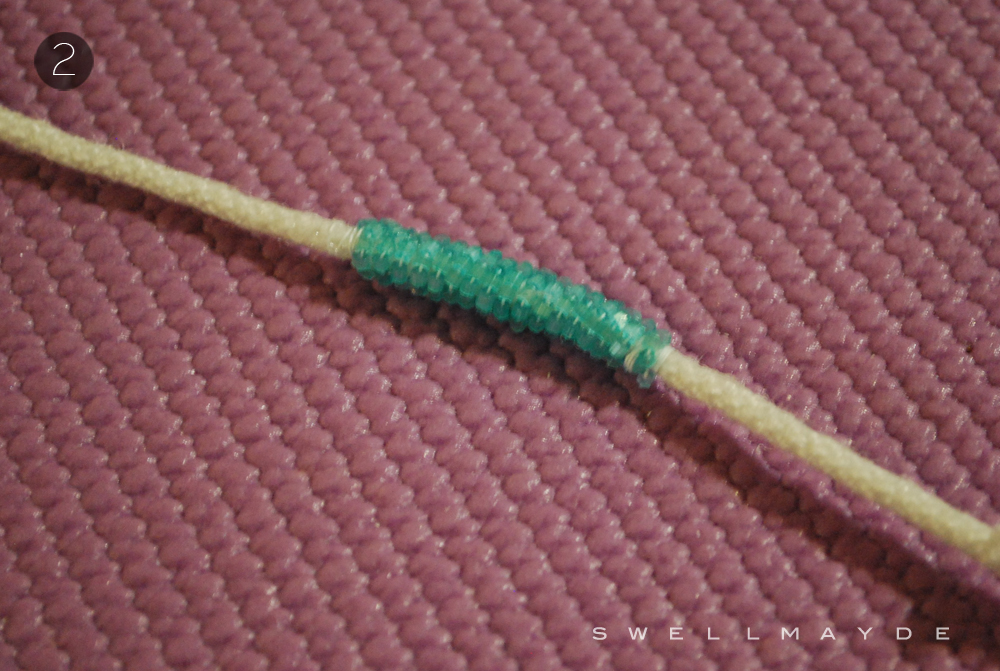
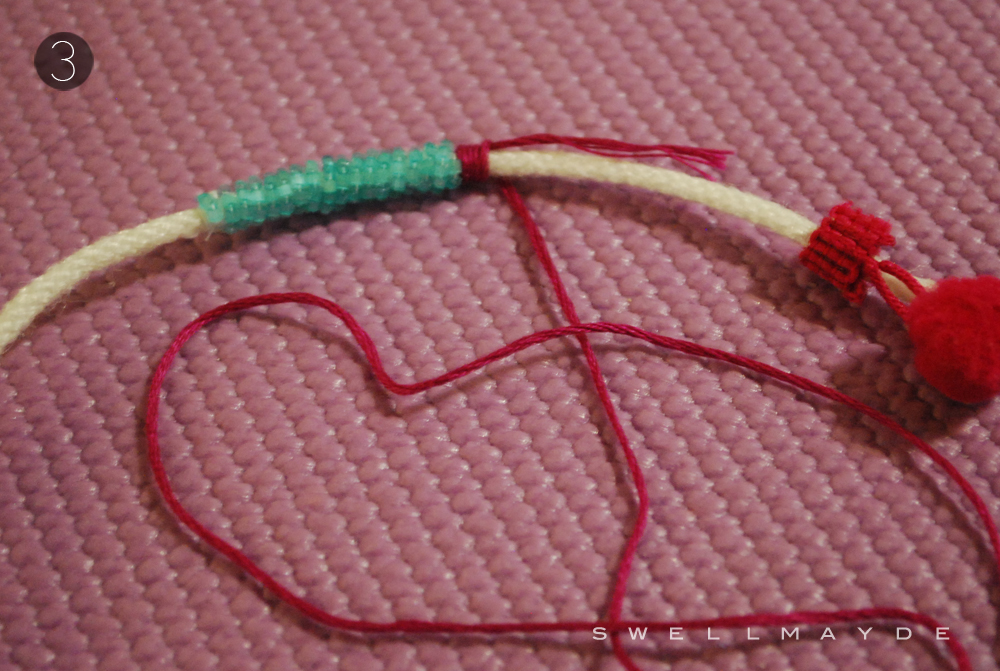
2. Add a thin layer of e6000 to middle area of the rope, about 1" long. Wrap the strand of beads around the glue section. You can double knot at the beginning and end using the thin string that the beads are stranded on. Let fully dry.
3. Take your first color of embroidery floss, double knot onto the rope, leaving a 3-5 inch tail. Add a bit of super glue to the double knot to prevent it from unraveling. Begin wrapping around the rope and the embroidery floss tail until you achieve the desired length. Then, double knot with the tail end and add a bit of super glue to the double knot. Cut extra ends. Mirror this section to the other side of the beads. Repeat with the second embroidery floss color.
4. Repeat step 3 with the 3rd embroidery floss color, except when getting closer to the glued loop end, add a bit of e6000 glue to the end in order to secure the wrap. Note that the loop must fit the pom pom. Double knot with the embroidery floss tail and add a bit of super glue to the knot. Cut off extra ends.
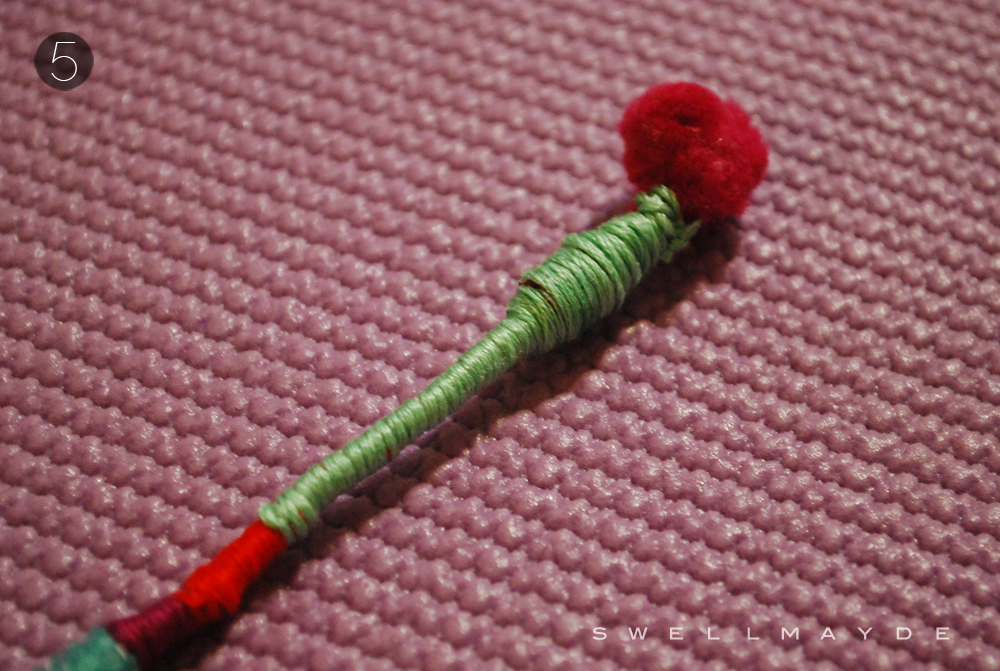
5. Like step 4, repeat the embroidery floss wrapping except add a thin layer of e6000 around the pom pom trim area before wrapping. Then, double knot with the tail end of the embroidery floss, double knot. Add a bit of super glue to the double knot, and cut off extra ends.

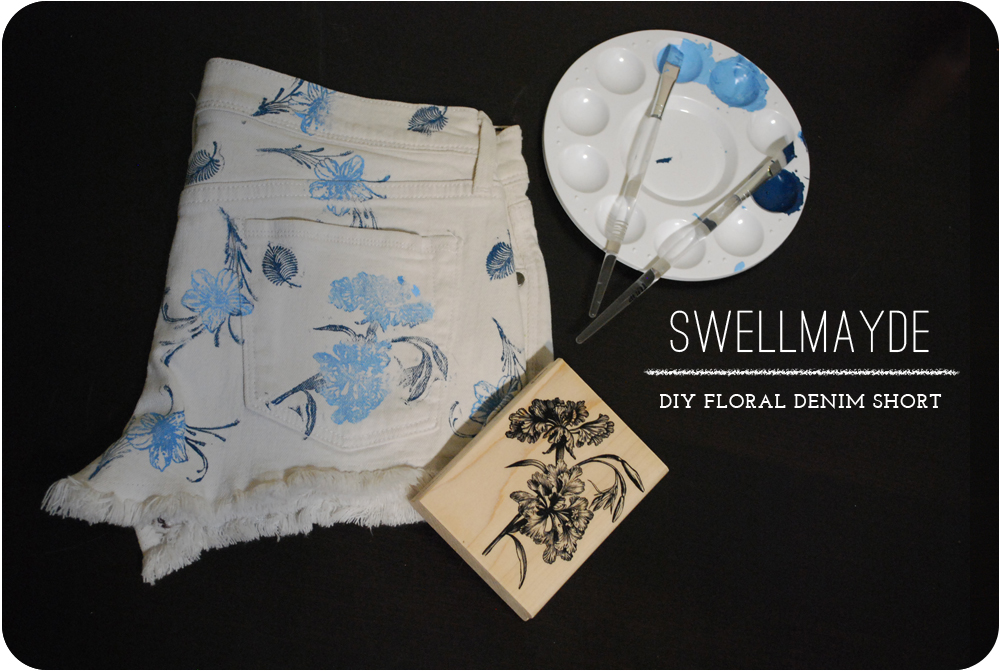
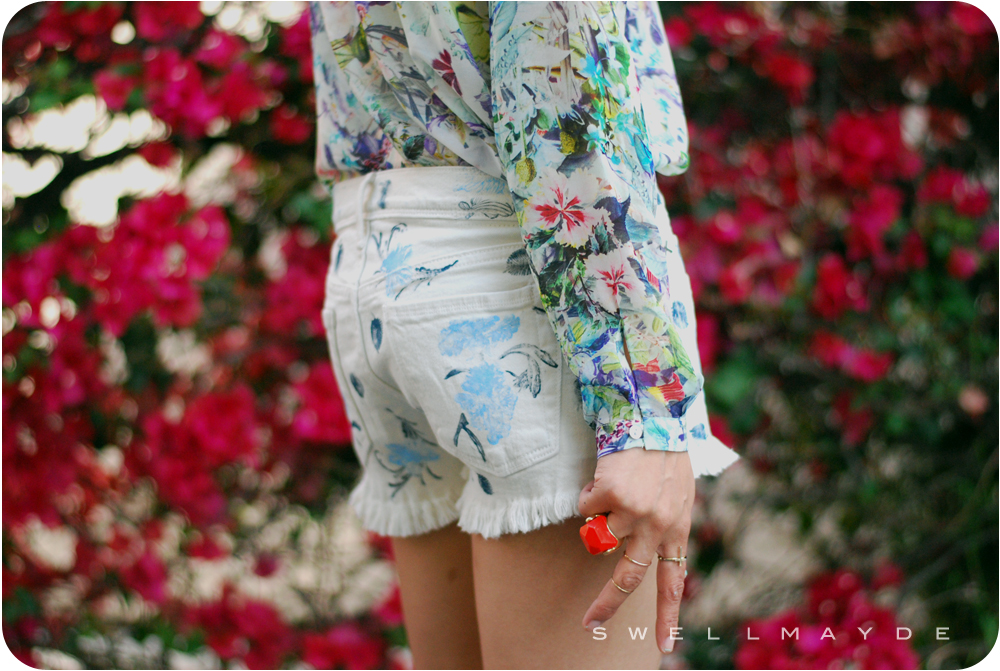
DIY: Floral Print Denim Short

I'm really loving what is happening in fashion these days. Prints, florals and color are popping up in every direction. I never saw myself as a print girl in the past, but I have been taking more fashion risks lately in an attempt to find new outfit combinations that work for me. This DIY was inspired by my new found obsession with wearing mixed florals and have found that wearing color and unexpected prints really brightens up my mood! How can I have a bad day when ther is party going on in my wardrobe!? In this post, I will show you how you can update a pair of shorts with a stamped floral print so you can chime in on this trend.
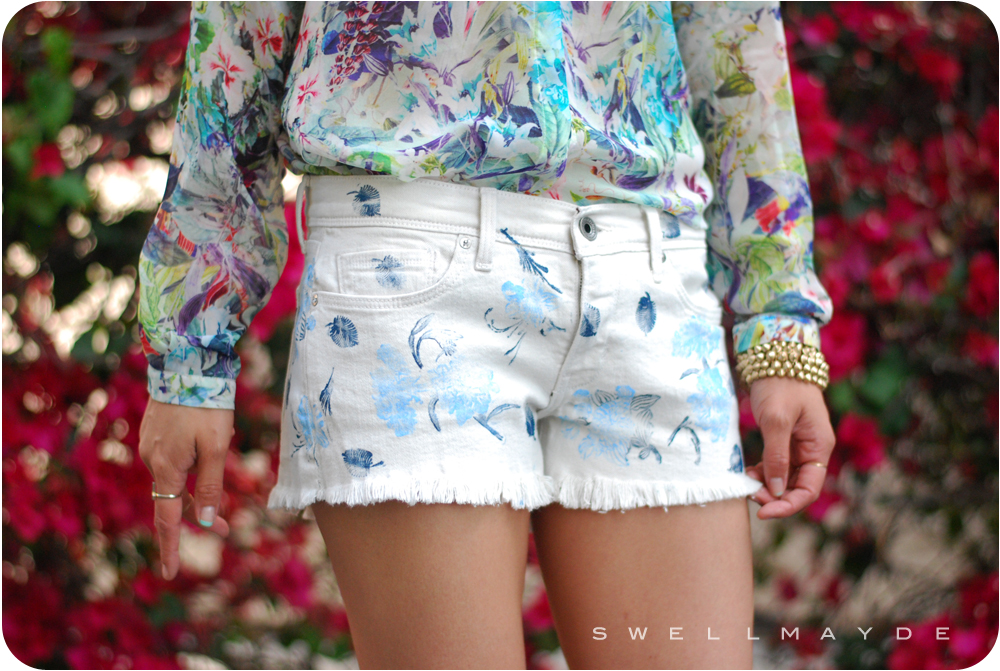
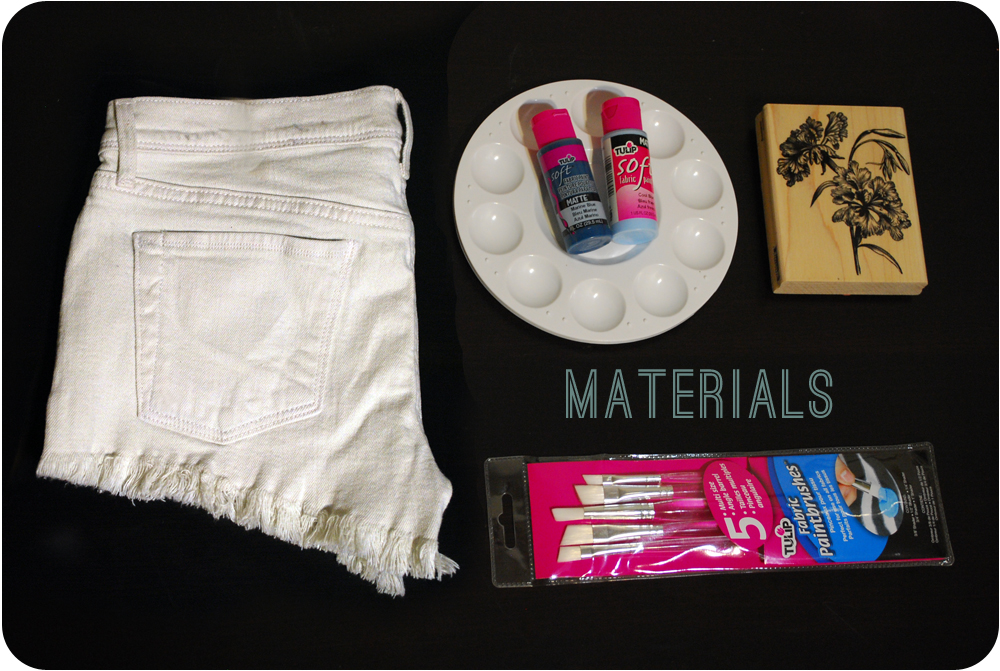
Materials:
- Denim Short (similar here and here)
Tulip Soft Fabric Paint in Marine Blue and Cool Blue (here)
- 2 Paintbrushes
- Paint Palette
- Floral Rubber Stamps (similar here)
Tutorial:
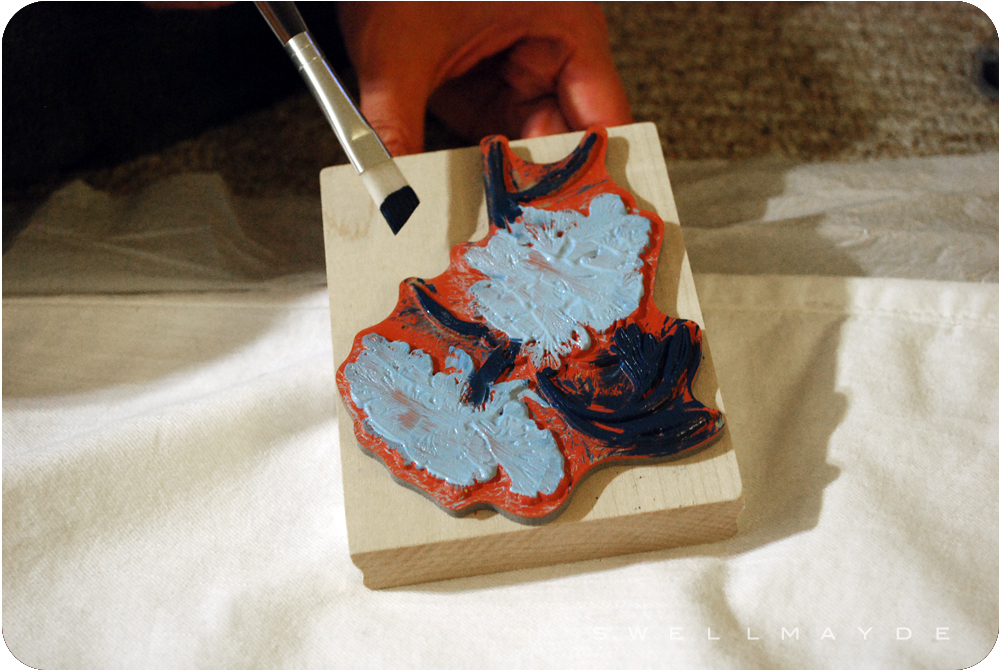
- I used a variety of stamps that I had on hand. I recommend using a couple different sizes. Pour out each color of paint onto the palette. Paint a light coat of Marine Blue onto the stem and leaf areas of the stamp and Cool Blue for the flower areas. Be sure to use a light coat and maybe test it out onto a scrap fabric to make sure you like the look. Then, continue all around the short. As you are stamping away, I recommend cleaning the stamp (running it through water and wiping off any excess paint) after stamping a couple times, the fabric paint tends to dry pretty quickly. Let dry fully dry. Have fun!!